Coldframes are great solar powered seed starters that you can use year round. If you’ve built one, used it in the spring, then left it to become overgrown with weeds for the rest of the year, now is the time to rethink that. This can be your go-to place for transplants all season, plus a place to harvest winter salads while waiting for the next round of seeds.
I generally start planting in my coldframe in early February with cabbage, collards, kale, chard, and other cool season things. If I am starting onion seeds, I might plant them in the coldframe in January. My next round of planting is for the warm weather crops, such as tomatoes and peppers. These are started about the last week in March, however this year it was April 5 when that happened. This year was a good year to not be in a hurry, since the weather was unseasonably cold and damp for longer than expected.
When I started seeds under lights in the house, I used to start tomatoes and peppers on March 1. They would require a lot of attention and watering. When it was getting close to time to plant them outside, I would have to harden off the plants—get them used to the outdoors—before they actually got planted in the garden. I’ve seen people having to do this with greenhouse plants. They would lug them in and out of the greenhouse each day. Whether you are taking them in and out of your house or a greenhouse, it’s a bother either way.
As I’ve gotten older, I like to think I’ve gotten smarter and not just lazier. I realized that I don’t have to start my tomatoes so early. The plants that come from my coldframe are acclimated to the cool soil and to the fluctuations of air temperature from day to night. I can keep the lid on, vent it, or remove it totally, as necessary. I do not put hinges on my coldframe lids for that reason. If they are light enough to be blown off in the wind, I use hooks and eyes to hold them in place. I can start more plants in less space than I ever could starting them under lights in the house.
Our last frost date here is about April 25. This year, however, frost hit in some places on May 14. It is good to have plants already tuned in to what nature is doing in times like this. A cold snap like that would be more damaging to tender plants raised under lights, than to hardy plants grown in a coldframe. Sometimes I pull plants out of the coldframe and put them in pots or wood flats to finish growing out so that I have room to start more seeds. I only do that if the weather conditions are such that the ones I pull out don’t need the protection of a coldframe anymore. I had done that this year with the tomatoes to make room for the sweet potatoes in the coldframe.
Peppers grow slower and need warmer conditions than tomatoes. When I turned to the coldframes for my transplants I wasn’t sure how it would be with peppers. I’ve since decided that this is a great opportunity to develop a pepper that will grow this way. Otherwise, why would I want to fool with it? If I save the seeds each year, I will have developed a strain that will grow well, no matter what nature brings. I like thick walled sweet peppers and Ruffled Hungarian is one that does well in the coldframe. I originally bought a few locally grown plants at a health food store in 2008 and have been saving the seeds ever since.
It is time to have the tomatoes out of the coldframe, so what’s next? I mentioned that the sweet potatoes went in after the tomatoes. I often don’t plant the sweet potato slips in the garden until about June 7. I’m always anxious, wondering if they will come up in the coldframe or if I should have started the sweet potatoes in jars of water in the house. Then the slips appear and take off. So, if you are anxious, also, have faith. When the weather is right, they will grow. Sweet potatoes like to be warm, so I keep the coldframe lids handy for longer than might be necessary. Learn more about growing your own sweet potato slips at https://homeplaceearth.wordpress.com/2011/04/26/grow-your-own-sweet-potato-slips/
I use transplants for corn and peanuts and worry about voles getting them in the coldframe. Although I have taken measures in building my new coldframes to keep out the voles, I still worry about these seeds, so I start them in large plastic pots, the kind trees come in. I like the kind with a lip on the rim to keep climbing critters out. These pots are scrounged, I didn’t buy them, and they are useful for many things. When the corn and peanuts are out, I can put other seeds for transplants in there or plant flowers and herbs to enjoy through the summer. Since I’m using them at a time when no protection is needed, I don’t have to worry about a cover. These extra containers are good to have when my coldframes are filled and I want more seed-starting space, once the danger of frost has passed.
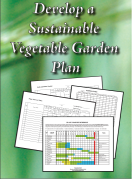
Once all the warm weather plants are in the garden the coldframe is the place to start transplants for later squash plantings, more flowers and herbs, or for brassicas plants intended for fall and winter harvest. You no longer need the winter lids to keep things warm, but you might need some shade. If you don’t have shadecloth, you can use an old bed sheet to shelter the seedlings from the sun. The key to this kind of planting is having a plan that shows everything that will be in your garden for the year. For a refresher for that kind of planning, read my post on Making a Garden Map. You will know what you need ahead of time and can plan your coldframe plantings accordingly. My post on Succession Planting will also give you some ideas for using summer transplants.
If you really aren’t interested in having a continuous supply of transplants though the summer, plant a crop in your coldframe after the last spring transplants come out. I have built a new coldframe to replace an old one and have planted potatoes in it to see if I was successful in keeping out the voles—otherwise, the sweet potatoes would be in there and I wouldn’t have had to put the tomato plants in flats. You could shade your coldframe and plant lettuce or just throw in some buckwheat. In thirty days the buckwheat will be flowering, making the honeybees happy and keeping the weeds away. In early September I plant lettuce in one of my coldframes to provide salads through December. I want that space to be clear for the January/February plantings. I plant the winter greens-kale and collards—under low tunnels. If they were in the coldframes, they would still be there when I wanted to start seeds.
Think of your coldframe as a place to harvest transplants all through the summer, not just in the spring. Consider it an important part of your garden and keep it filled.


