Feeds:
Posts
Comments

Archive for the ‘tomatoes’ Category

salsa ingredients for one batchWhen I was first learning to can back in the 1970’s salsa was not on my radar at all. That might be because the canning books I followed didn’t have any recipes for it. Fast forward to the 21st century and there are lots of salsa recipes in the canning books. Salsa is a form of relish and is as easy to make as pickles. It does require some chopping, which I do with a knife; although some people prefer to use a food processor. I can salsa for use later and include vinegar, as you would for other relishes. Recipes for salsa to consume fresh might not include vinegar.

salsa ingredients-choppedThe recipe I use is for Zesty Salsa that I found in the Ball Blue Book from 1998. You can find the same recipe here. The main ingredients are tomatoes, peppers, and onions which I have in my garden. The vegetables you see in the first photo are the ones shown chopped in the second photo—all of which made the 6 pints of salsa in the last photo. Besides tomatoes, peppers, and onions, the recipe calls for cider vinegar, garlic, cilantro, salt, and hot pepper sauce (optional). I always have garlic available from my garden. Instead of cilantro, which I don’t grow, I used celery leaves and parsley from my garden. One of the reasons I like making salsa is that it is so colorful when you have everything chopped up together.

Although the recipe includes both green sweet peppers and hot peppers, I am not into hot so I used sweet peppers only and no hot sauce, although I have added some mildly hot peppers in the past. You have to be careful with canning recipes. You can sometimes make substitutions, but you need to do them wisely. The salsa was canned in a hot water bath which is used for high acid foods, so care must be taken to maintain the acidity. Tomatoes are high acid foods, but onions and peppers are not. Vinegar in the recipe contributes to the acidity. You can substitute different kinds of peppers, such as sweet for hot, but be careful to not have more than the total amount of peppers called for in the recipe. The same goes for onions. They could be any combination of red, yellow, or white, but the total should not exceed the amount in the recipe. The Complete Guide to Home Canning has great information about this and other substitutions. You can find it online at the National Center for Home Food Preservation website as a free download or order your own hardcopy at Purdue Extension’s Education Store.

jars of salsaBesides tacos, salsa can be used as an addition to many foods, including potatoes and eggs. Of course, it can be eaten as a dip just as it is. I grow cowpeas out to dried beans, store them in jars in the pantry, then cook them as needed. We have found that salsa goes great with those cooked cowpeas. If you are growing your own staple crops, salsa and other relishes can add interest and taste to your meals. Last winter friends gave us two jars of relish. One was corn relish, but I don’t remember the name of the other. It was all delicious on cowpeas. If you are putting up pints for your table, make sure to can some half-pints (jelly jar size) to give as gifts. The time, energy, and produce that went into making the salsa now will be appreciated by the recipients when gift-giving time rolls around. It will also make your life easier to have something on hand to share with your friends anytime the mood strikes. If you are wondering about those white lids on my canning jars—they are reusable lids. I like to use them on high acid foods and only on jars that I won’t be giving away. I’ll have to make another batch with regular lids for gift jars.

Salsa, canned in jars, is a convenience food for me. I have not tried fermenting it, but according to Sandor Katz in The Art of Fermentation, you could do that. Reduce or eliminate the vinegar and use plenty of salt. Tomatoes, peppers, onions, and garlic are available at the farmers markets now. If you haven’t grown your own, you could still do this. The 10 Day Local Food Challenge is coming up in October. If you plan on taking part, having a supply of salsa put up will enhance your meals. The 10 Day Local Food Challenge allows ten exotics in your diet, which are items not local. For me, that would be the salt and vinegar in the recipe. I haven’t made vinegar, but I suppose you could make your own from local apples. Then vinegar would be off the exotic list. Maybe you could find a vinegar maker and saltworks within your local food shed. It is something to think about.homeplace earth

Read Full Post »

Butternut Squash

Butternut Squash–sometimes squash flowers are taped shut after fertilizing.

Saving your own seeds is a wonderful thing to do, but it is something you should plan for early in the growing season. If you know you will be saving seeds, make sure the varieties of each crop you will be saving from do not have a chance to cross pollinate with other varieties of the same crop. There are charts online and in seed saving books that give isolation distances for each crop—the distance varieties must be separated to avoid cross pollination. The distance might be shortened if there are barriers present, such as trees or shrubs and solid fences. Having a hedge as a boundary around your garden would decrease the distance you have to be from your neighbor’s garden to avoid cross pollination.

You could use time as an isolation method. Plants that have a limited blooming period can be managed so that the flowering of different varieties doesn’t happen at the same time. For example, on the same day you could plant two varieties of corn that have at least two weeks difference in their dates to maturity. The pollen from the first variety will have finished by the time the pollen is released from the later maturing variety. Or, you could plant two varieties of corn with the same dates to maturity, but space the planting times two weeks apart.

Some growers resort to using bags or screened cages to keep their crops from cross pollinating and some even resort to hand pollinating. Hand pollination is sometimes done with flowers in the squash family—the cucurbits. I’ve never had the patience to watch for female flowers to open, then pollinate them with pollen collected from the male flowers of the plant. The fertilized flowers would then be taped shut. If I intend to save seeds from squash crops I only plant one variety in each species in the genus Cucurbita. Although there are six species, I’ve only encountered four: Cucurbita maxima, C. mixta, C. moschata, and C. pepo. You can grow one variety of each species at the same time without worrying about cross pollination. A good seed catalog will indicate which species a squash variety belongs to.

Have goals in mind for what you are selecting for. When you are first starting out you might be happy to save any seeds at all. Collecting from as many plants as possible will give you a broader range of genetics; however, you might want to select for certain traits, such as earliness, lateness, taste, shape, size or color. If you save seeds from the plants that produce the first tomatoes of the season, you are selecting for earliness. Those plants may or may not be the same plants that produce tomatoes the longest into the season. Pay attention to what drives you to choose the plants to save from. Sometimes you will notice a plant that is doing exceptionally well, but it is not the right time to save seeds yet. Tag that plant that has the characteristics you want to preserve so you can identify it when the right time to save seeds occurs.

Principe Borghese tomatoes

Principe Borghese tomatoes

When tomatoes and peppers are harvested at full ripeness for eating, their seeds are mature and can be readily saved. For summer squashes and cucumbers, you would need to leave the vegetables on the plant until they are overgrown and way past the time to harvest for eating. Still other crops need to be left over the winter, saving the seeds when the plants flower the following year. The extra time for these plants to be in your garden needs to be accounted for in your garden plan.

Red Russian kale gone to seed.

Red Russian kale gone to seed.

The kale and collards you might have harvested for food for the table through the winter will be vacating your garden bed in March when they begin to bolt. However, if you are saving seeds from them, they may occupy that space until June. Only let one variety of cabbage family plants flower and go to seed at a time to avoid cross pollination. Before the variety you are saving from begins to flower, you should have begun to choose which plants you want to save seeds from. Most likely, the first to flower won’t be among your choices, nor will the plants that produced the least foliage to harvest through the winter. Pulling those plants out first leaves more room for the others and is part of the selection process.

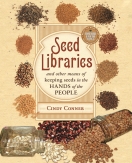
Seed saving is a way to deepen your gardening experience and is an adventure that you can share with others through your neighborhood seed library. If your seeds are destined to be shared through a seed library, you will want to make sure that what you are sharing is what you say it is and hasn’t cross pollinated with anything else. If you don’t have a seed library in your neighborhood you may want to start one. You will find guidance for that project in my book Seed Libraries and Other Means of Keeping Seeds in the Hands of the People.

Seed libraries have been evolving at a rapid pace. Those who have been involved in that evolution will be coming together to study the issue at the First International Seed Library Forum in Tucson, Arizona, May 3-6. I’m looking forward to being one of the panelists for that event. You never know where your seed saving hobby will take you.Homeplace Earth


Read Full Post »

Floriani Red Flint and meal (L)-Bloody Butcher and meal (R)

Floriani Red Flint and meal (L)-Bloody Butcher and meal (R)

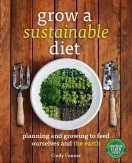
For some years now, during the Fridays in Lent, I have been only consuming what I’ve grown myself in my garden. You can read about my previous Homegrown Fridays here. I know from experience that this takes some concentration and dedication each Friday that I do this. We usually have something at a meal that comes from our garden or from a farmer we know personally, but limiting the meal to only what I’ve grown means no dairy products, no vinegar on the greens, and no olive oil. Also, this time of year if I’ve run out of potatoes and onions I have to buy them from the grocery store—something I’m not happy with. Last year, in spite of being terrifically busy writing Grow a Sustainable Diet, I kept to the Homegrown Fridays eating only what I had grown. This year I am deep into writing another book—Seed Libraries and other means of keeping seeds in the hands of the people. I really want to keep the momentum going on this newest book and decided to be kinder to myself and not be so distracted on Friday. Also, maybe if I back off a little on my self-imposed rules, others will find it more doable. Last year on my Homegrown Fridays 2013 post I invited comments from anyone who had tried the same thing and had no takers.

I’m still sticking to eating something that I’ve grown at each meal on the Fridays in Lent, unless I’m traveling and eating away from home. This year, however, the meals might also include some other ingredients. The stored staple crops I have available are the same as before—sweet potatoes, cowpeas, corn for cornmeal, garlic, peanuts, and maybe hazelnuts and walnuts. There are also greens from the garden, eggs from the chickens, dried and canned produce, and mead. Check my past Homegrown Fridays for examples of meals from only these ingredients.

This year I have some new additions. We made grape juice from our grapes in 2013. Not a lot, but some to save for Homegrown Friday breakfasts. Breakfast is still by the old rules. I have cornmeal mush cooked in water, rather than milk. The honey I put on it is a gift from my friend Angela’s bees (okay, so I bent the old rules a bit for breakfast since it’s not my honey). Our bees did not survive the winter in 2013 and, being so busy, we didn’t replace them. However, new bees are arriving this week. Yeah!

I tried a new corn in 2013 and find I like the taste a little better than Bloody Butcher. Floriani Red Flint corn didn’t yield as well as my tried-and-true Bloody Butcher that I’ve been growing for more than twenty years, so I’ll be working with it to see what I can do. I’ll be planting both varieties in 2014. When I first planted Bloody Butcher I had also planted a yellow variety that I don’t remember the name of. Bloody Butcher did much better than the yellow corn, so that’s what I stuck with. Since Floriani Red Flint and Bloody Butcher are both red corns, I was surprised at the difference in color when I ground them into cornmeal. You can see in the photo that Floriani Red Flint is yellow and the Bloody Butcher cornmeal is purple, which I was already familiar with.

cowpeas with dried tomatoes and onions

cowpeas with dried tomatoes and onions

Changing the rules gives me the opportunity to tell you about my dried tomatoes in olive oil. When I dry tomatoes in my solar dryers, sometimes there are ones that aren’t quite dry when the rest are. I put the not-quite-dry ones in a jar of olive oil that I keep in the refrigerator, adding tomatoes as I get them. An easy and tasty dish is to sauté a cut-up onion in the olive oil from that jar, along with some of the tomatoes. Add some cooked cowpeas until they’re heated through and there’s lunch. I often refer to those tomatoes as flavor bites and add them to scrambled eggs and quiche.

blessing_130516_A1-198x300If you’ve enjoyed following my Homegrown Fridays, you are going to love reading Blessing the Hands that Feed Us by Vicki Robin. If her name sounds familiar, you may know her as co-author of Your Money or Your Life. I read Blessing the Hands that Feed Us when it came out in January this year and thoroughly enjoyed it. Robin limited her diet to what was grown within 10 miles of her home for a month! It all began when a friend wanted to find someone to feed from her garden for a month and Robin, who refers to sustainability as an extreme sport, offered to give it a try. Before starting on this adventure she put some thought into it and decided to widen her diet to the ten miles to include dairy, eggs, and meat, but the bulk of her meals came from her friend’s garden. She allowed what she referred to as exotics—oil, lemons and limes, salt, a few Indian spices, and caffeine–which enhanced her meals. Giving yourself limits like this doesn’t so much limit you as it does open your heart and mind to so many more issues at hand. If you include exotics, how are the workers responsible for growing them and bringing them to you being treated? How is the soil that grows these things being treated? The food you get from local growers—how is it grown and are the growers getting a fair return for their labor, knowledge, and care? Is the treatment of the soil your food is grown in building the ecosystem for those living nearby and for the earth community at large?

One of the things that Robin brought up in her book was that as we go forth in these changing times we need to be operating out of love and not fear. I talked about that same thing in Grow a Sustainable Diet. Both books also talk about community. We do not live in a vacuum, needing to provide all of our own needs. Yes, on Homegrown Fridays I explore what it would be like if my diet only consisted of what I’d grown myself. I do that to bring my own focus to what is really important to me and examine what I really need. It deepens my appreciation for what I eat all the other days of the year and for the people and the land that supply what I can’t. When Angela gave me that quart of honey last summer, I truly valued it, knowing that my homegrown supply from the previous year would be running out. My Lenten Homegrown Fridays begin the thought process about what it would take to go forth in a peaceful, loving way that treasures all of life.Homeplace Earth

Read Full Post »

dried food in jars-2012-BLOGThis is my third summer using solar food dryers and they have become a firm part of my food preservation plan. Of course, the biggest aspect of my plan is to need as little preservation as possible. So, we eat as much as we are able to out of the garden all year. Next is to grow crops that pretty much store themselves. That would be things like onions, garlic, winter squash, potatoes, sweet potatoes, cowpeas, hazelnuts, and peanuts. Some things are fermented, particularly cucumbers and cabbage. I’ve had a huge jar of dill pickles on my kitchen counter for most of the summer, sort of like what you might see in a deli. We take pickles out whenever we want. Some of the snap beans get salted in a crock. The rest of the snap beans and extra tomatoes are canned. 

principe borghese-BLOG

Principe Borghese tomatoes

The crop that I dry the most is tomatoes. There are varieties that are better suited for this and I’ve been growing some. Principe Borghese (preen-see-pee bore-gay-zee) has been the most prolific so far. I had a harvest of about 75 pounds from the plants that grew along a 16’ livestock panel. Principe Borghese is a determinate variety, pumping out the whole harvest in 5-6 weeks. The seed catalog says the days to maturity for this variety is 78 days, however, I’ve found my harvest begins at about 60 days from transplanting and I had my first tomatoes before July 4th this year, without even trying.  These tomatoes look like large cherry tomatoes. Sometimes I cut them in half to dry and sometimes I cut them in quarters. 

I also grew Hungarian Paste tomatoes, another determinate variety. I began harvesting these about 18 days later than Principe Borghese and picked for only 4 weeks. That was too short of a harvest window for me, but the blister beetles had moved in on the plants. This variety is similar to Roma and Amish Paste. I had some trouble with blossom end rot on the first flush this year, which might have been caused by weird weather; however, blossom end rot has been a problem with this type of paste tomato on the first flush in my garden in other years.  I’ve had my soil tested and calcium deficiency is not the problem.

long tom-closeup-BLOG

Long Tom tomatoes

A new variety, for me at least, is Long Tom, an indeterminate. I only have a few plants and they were put in late, but I’m really impressed with the tomatoes I’m getting. It could be due to the bed they are in, but these meaty tomatoes have been weighing 4 ounces each! If you don’t like seeds in your dried tomatoes, this is the variety to grow. I’ll pay more attention to Long Toms next year. All these varieties and more are available through the Southern Exposure Seed Exchange catalog.

The list of things I’ve dried in my solar dryers is: apples, cabbage, celery, collards, grapes, kale, mushrooms, okra, onions, parsley, peaches, peppers, sweet potatoes, tomatoes, and zucchini. I’ve dried snap beans, but I found we just don’t eat them. They are good, however, reconstituted in chicken broth. One of the good things about drying is that you don’t need to have the quantity that you need when you are canning. You can put small amounts of this and that in the dryers. I’ve found that I can salt the snap beans in a crock and add to it over the next couple weeks as the harvest comes in, otherwise if I had a small amount, they’d go in the dryer.

SW trays open-BLOGASU dryer inside-BLOGI have two dryers and each have special features. One, the SunWorks model, exposes the food to the sun. Historically, that’s how things were dried, lying out in the sun. The larger model, based on plans developed by Appalachian State University (ASU), does not expose the food to the sun. If I’m drying mushrooms, I put them in the SunWorks dryer since mushrooms really develop a lot of vitamin D when exposed to the sun. If I’m drying collards or kale, I put them in the ASU dryer. The greens dry quickly in either one, but they stay greener out of the sun. I built the SunWorks dryer with an electric backup option. I played with that a little that first year, but haven’t plugged it in since. If the weather takes a turn and it rains, I just leave the food in until the sun comes back out and it dries. When drying is complete, I put the food in glass canning jars and store them on shelves in my pantry. Of course, if the weather promises to be rainy and damp for days, which is the pattern we seem to be in at the moment, I resort to canning.

You can find more information about my solar dryers at my blog posts Solar Food Dryers and Solar Food Dryers-Update. The Solar Food Dryer, a book by Eben Fodor, was my guide in making the SunWorks dryer. A good book to refer to in handling the food is Making & Using Dried Foods by Phyllis Hobson. I’ll have both books for sale at my booth at the Heritage Harvest Festival at Monticello on September 15 and at the Mother Earth News Fair at Seven Springs, Pennsylvania on September 21-23. I’ll also be speaking on Solar Food Drying at both events.  See you there!


Read Full Post »

tomato juice and soup-BLOG

tomato juice and soup

Almost everyone grows tomatoes and eventually has enough to preserve for later. I’m interested in using the least energy to get my food to the table and have been using my solar dryers as much as possible. Sometimes with tomatoes, however, I have too many for the dryers, the weather is threatening rain, or I just need to get these tomatoes through my kitchen in a hurry.

When the kids were growing up, I used to can a lot of spaghetti sauce. I would add garlic, onions, basil, parsley or celery, and peppers, all from the garden, and cook that sauce down for a couple hours before canning it. I did that on the days with the most tomatoes. On the days with a lesser harvest, I would can tomato juice or tomato soup. The juice would be used as a base for soup. I could use a quart of juice and throw in all sorts of vegetables and leftover meat. Of course, you could also just drink the juice.

Now that I’m drying tomatoes, I use the dried ones for spaghetti sauce and have become spoiled. I no longer have a kettle of tomatoes boiling away in my kitchen on hot summer days. By choice, we don’t have air conditioning in our house and are very aware of anything emitting heat. But still, there are those days when I have to resort to canning tomatoes. When you look up tomatoes in the canning books, they tell you the first step is to dip them in boiling water for 30-60 seconds, then in cold water to remove the skins. I have never thought that was a good idea. Talk about heating up the kitchen! You would only want to do that if, for some reason, you needed to have whole tomatoes in your jars. If you are making sauce there is no need to keep them whole.

foley mill-closeup -BLOG

Foley Food Mill

I acquired a Foley Food Mill early on in my canning days to make applesauce with and it works perfect for putting the tomatoes through to remove the skins and seeds. The tomatoes need to be quartered and cooked till soft to go through the Foley mill. You put them in the top, stir it around and the juice comes out the bottom. You need to dump the skins and seeds in a container and fill the hopper again. It is a handy tool to have in your kitchen. Mine hangs from the rack with my pots and pans. In the photo, it is being used on a pan on the stove. That burner is not on, it is just more convenient to use it there because the pot with the tomatoes was still hot.

I use tomato juice to make the tomato soup I can, a favorite for lunch, especially when a friend or one of our grown children stops by. It is all ready to heat and eat. Once the juice is made there is minimal preparation to make the soup, which is then put in the jars and  run through the canner. In the first photo you can see jars of tomato juice and soup on my basement shelves. My recipe is based on one that came from our county cannery back in the mid-1980’s. I’ve posted it on my recipe page here.

Victorio strainer-BLOG

Victoria Strainer

The Foley mill works great, but you have to cook the tomatoes first. That’s hot work, but not as hot as dipping them in boiling water to remove the skins. In 1986 I bought a Victorio Strainer. I see they are still available today, as are any parts you might need. You only need to quarter the tomatoes and put them through raw. I’ve been using it with the small Principe Borghese tomatoes I have and I just wash them and put them through, no cutting needed.  With the Victorio strainer the skins and seeds separate out to a container as you continue to put the tomatoes in. No need to dump anything out in the process, as with the Foley mill. The tomatoes are never heated until the juice is heated to put into the jars or made into soup. That’s our daughter Betsy working on her tomatoes with the Victorio.

But what if you’ve canned enough soup and juice for the year and you still have more tomatoes than you know what to do with? You can put up more juice to be made into spaghetti sauce later. This is where your other dried veggies can be useful. Use your limited solar dryer space to dry okra, zucchini, peppers, onions, parsley, celery, and anything else you might want to put in spaghetti sauce. I didn’t mention garlic because I just store that as it is for the year and have cloves whenever I need them. I didn’t mention basil either. It is a staple in spaghetti sauce, but it doesn’t go through the dryer. I hang it in my kitchen until dry, then store the basil leaves in jars. When you want a thick spaghetti sauce, combine the juice with the dried veggies and herbs, give it all a whirl in the blender and cook it for a short time-maybe simmer for five minutes or so. If you have time, let it set a little longer to let the flavors blend. Your sauce can be ready by the time your pasta is cooked and the table is set.

This is an opportunity to get really creative. You can add different things for different dishes. The okra or zucchini is the secret to getting thick sauce in a hurry. If you don’t add okra or zucchini, you will have to do more cooking, however, cooking down a quart of sauce takes much less time than cooking down a couple gallons of sauce. If you have enough dried tomatoes, you could add some of those, also.

tomato juice-gallon jars-BLOG

tomato juice in gallon jars

Okay, maybe you think all that might be a good idea, but you still just want to can spaghetti sauce. You could juice the tomatoes and put them in the fridge overnight. The solids will separate out from the “tomato water”. You can preserve the “tomato water” to add to soups throughout the year. Use what is left to cook down in a shorter time for sauce. The photo shows two gallon jars with juice from the Foley Food Mill and the Victorio Strainer after they’ve spent the night in the refrigerator. For some reason, the juice settles out with the “water “on top with one method and on the bottom with the other. That relatively clear liquid is what is being boiled away when you cook your sauce down.

Tomatoes can be canned in either a water bath canner or a pressure canner. Since I have a pressure canner, I use that, but when I started canning, all I had was the water bath. Make sure you follow all the safety guidelines whenever you can anything.  The National Center for Home Food Preservation is a great resource and has the book Complete Guide to Home Canning available as a free download. The print edition can be ordered. The book So Easy to Preserve is available for order from the same website at http://www.homefoodpreservation.com/. That book includes freezing and drying.

I hope I have given you some helpful ideas. Have fun and stay cool!

Read Full Post »