Feeds:
Posts
Comments

Posts Tagged ‘permaculture’

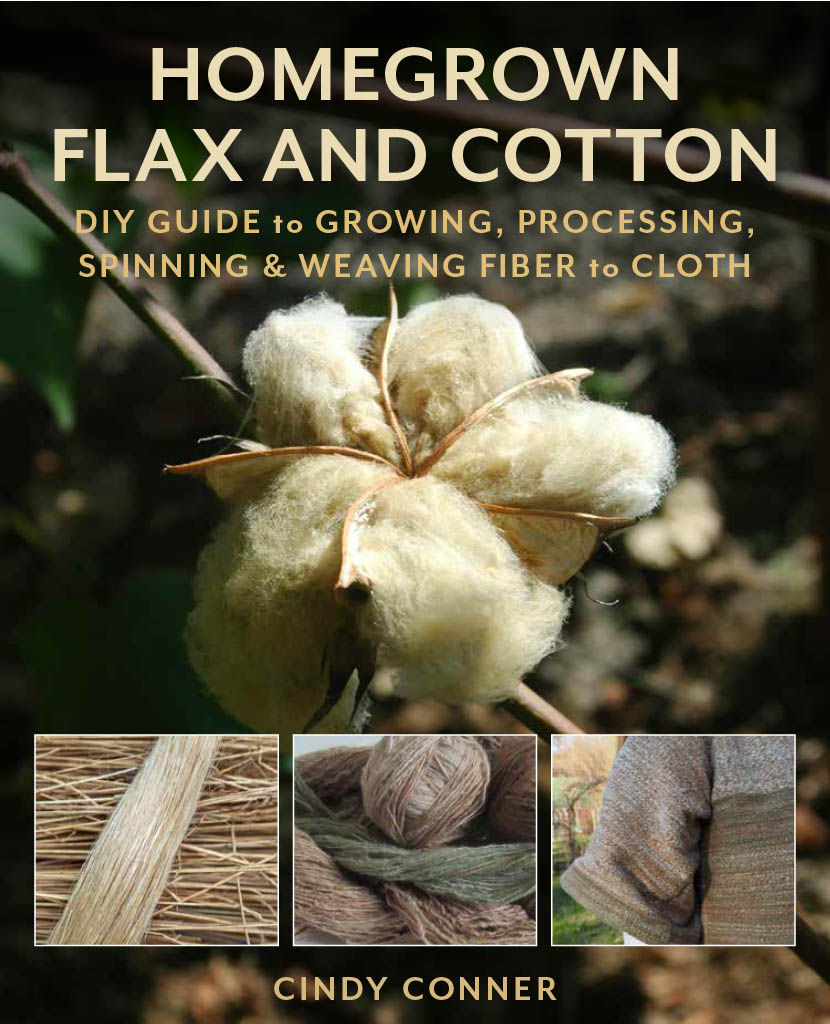
My new book, Homegrown Flax and Cotton: DIY Guide to Growing, Processing, Spinning & Weaving Fiber to Cloth is here! If you want to learn how to clothe yourself from your garden, this is the book for you. Even if you never grow your own clothes, it is interesting to learn how one could do that.

Learn when to plant the seeds of flax and cotton and how to go about getting the resulting fiber into something to wear. (Once flax is spun it is called linen.) To go from seed to garment you need skills in gardening, spinning, weaving (or knitting and crocheting), and sewing. In the case of flax, you will need to break, scutch, and hackle. This book leads you through all that and suggests resources to help you along the way. It even includes detailed plans to make a tabletop flax brake. There are also plans to make a one-yard swift that can be adjusted for the skeins once they have shrunk from scouring. Homemade hackles are covered, also.

You can order autographed copies from me at www.HomeplaceEarth.com or come and see me at one of my book signings. I will be at the Ashland Farmers Market on Saturday, July 1, from 9am-noon. On Saturday, August 12, at 11am I will be at the Ashland Branch of the Pamunkey Regional Library giving a talk and signing books. In October you can find me demonstrating flax-to-linen and signing books at Scotchtown, home of Patrick Henry, on Saturday, the 7th, and at the Fall Fiber Festival at Montpelier Station, VA the next day on October 8.

Monday, September 25 visit me at the Horticulture Pavilion at the State Fair of Virginia from 10am-2pm. I won’t have books for sale, but will be talking about my work and have equipment and my homegrown clothes on display.

All these events are listed on the Events page of my website. As more things are scheduled, I will update the page, so check back regularly. You may possibly find me at the book signing tent at the New York Sheep and Wool Festival in Rhinebeck, NY in October.

When I first started on this adventure I often had trouble finding answers to my questions. Sometimes I just had to figure it out for myself. I wrote Homegrown Flax and Cotton to help you have an easier time of following this path—and to have more people in the know to play with. Hope you join the fun!

Read Full Post »

I have just posted the events in 2022 that I have committed to. You can see the list here or view it on the events page of my website at www.HomeplaceEarth.com. Except for the talk about transitioning from a home gardener to a market gardener at the Virginia Association for Biological Farming conference (VABF), all the talks are about fiber. I love to give the transition talk, by the way. I want new farmers to start out strong. I was a market gardener myself for 10 years and spent 11 years teaching sustainable agriculture in order to put more farmers out there and have seen people jump into selling their produce before they have thoroughly thought through what they need to do to be successful.

I am looking forward to talking about my work with cotton and flax/linen. As you know, the pandemic has changed the way we communicate and there is no going back completely to the way things were. Fiber guilds that have kept active have quickly adapted, allowing folks to attend meetings and classes that would have been prohibitive before. The Central Virginia Fiberarts Guild is an example of that and has attracted new members from further afield. I’ll be speaking on Zoom at their February meeting. When in-person meetings resume I’m sure there will be a virtual component to the guild’s offerings. Nevertheless, I will be doing some in-person events at other places, as you can see. Hope to see you there!

January 12  Richmond Weavers. Cindy is giving the talk The Sustainability of the Fibers We Use.  This is a regular meeting of the Richmond Weavers. Richmond VA. www.richmondweavers.org.

January 23-24  Virginia Biological Farming Conference. Cindy is giving the presentations Transitioning from a Homestead Gardener to a Market Gardener on January 23 and From Seed to Garment on January 24. The Hotel Roanoke Conference Center, Roanoke, VA.www.vabf.org.

February 6  Central Virginia Fiberarts Guild.   Cindy will give the talk Flax-to-Linen: From Seed to Garment.This is a virtual meeting of the Central Virginia Fiberarts Guild. www.cvfg.org.  

March 11-12  Carolina FiberFest.  Cindy will give the talk From Seed to Garment: grow your own cotton and flax/linen clothes on March 11.North Carolina State Fairgrounds Expo Center. www.carolinafiberfest.org. 

Read Full Post »

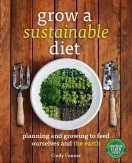
GrowSustDiet~Cat100%25My new book Grow a Sustainable Diet: planning and growing to feed  ourselves and the earth is now available through my website at HomeplaceEarth.com. The home page contains two recently added preview videos about our DVDs. The purchase page contains more information about the book, plus the “add to cart” button to buy it.

You’ll find more information about what this book is about at my August 13, 2013 post  Grow a Sustainable Diet–the Book! 

Read Full Post »

cucumber plants surrounded by water

cucumber plants surrounded by water

This year hasn’t been one of favorable weather, as far as gardening is concerned, with warm weather slow in coming in the spring. Now, here in Virginia, we’ve had a wet summer. The water table tends to be high at our place. That means that in the low spots, there will be standing water when we have much rain.

My garden slopes to the northwest corner. The west side of the garden is the wettest in this kind of weather, particularly in that northwest corner. I decided to check just how much the drop was on the north side of my garden from east to west. I ran a string from one side to the other, using a level to align it correctly. The string was 12” above ground on the east side and 24” above ground on the west side—a 12” drop! The bed in that corner is good in the drier years, but marginal at best at other times. I’ve ignored it for far too long and have decided that I should address this problem this year.

Before I tell you what I’m going to be doing with the bed in that low corner, I want to tell you what I’ve already done in my garden to help with such issues. Although we have too much rain right now, more often, the problem is too little rain. The best place to store water in your garden is in the soil. Double digging the beds when you establish your garden will open the soil and give water a place to be. Of course, if your garden is in the low spot of your yard and you double dig your beds, you might have to dig a trench around your garden to route the extra water somewhere else to hold it for awhile in times of heavy rainfall. Double digging is a job for when the soil is dry, not something you would be doing if you currently have standing water. I know some of my readers are in drought prone areas and find it hard to imagine too much water. If that is you, kindly forward this post to folks you know in wetter areas.

Having permanent beds and permanent paths is a help. The beds are double dug to start and then not walked on. Your feet are confined to the paths, which can be mulched. Not wanting to find mulch materials for my paths, I’ve gone to growing white clover in them. When I formed my beds I dug out the1½ ft. wide paths between them and put that soil onto the garden beds. It gives the impression of raised beds without using any materials to frame them. You can see the benefit of that in the first photo. Extra rainwater can drain from the beds and slowly seep into the soil in those paths. The cucumber plants you see in that picture did fine, once the weather evened out. When that photo was taken we had had 6.25” of rain in seven days.

garden-august 2008-combined-BLOG

garden with permanent beds, cover crops, and compost

Organic matter helps hold nutrients in reserve for your crops, otherwise, too much water can wash them away. You can build organic matter in your beds by growing cover crops and by adding compost. I have cover crops in my rotations and regularly add compost to my beds. If you are not familiar with gardens with permanent beds and permanent paths, compost, and cover crops, you might want to watch my DVD Cover Crops and Compost Crops IN Your Garden. You can see a preview of it here. Having enough cover crops in your rotation to use them as compost material enables you to avoid bringing in compost materials that might be harmful to your garden. Find out more about that issue in my post Killer Compost.

If you’ve done all of the above and your garden, or places in it, are still too wet, use this as an opportunity to explore new things. Take a good look at what is going on. It might be that you are still building your soil and things will get better. However, if you know this is a recurring problem, reconsider what you’ve been doing. You could change the crops you grow there. In 2004 I grew rice in my waterlogged corner and was successful with a harvest of 8 pounds per 100 sq. ft. However, I learned that rice needs to be hulled and I never got around to doing that. Maybe I should try that again. I could have a rotation that includes rice in several beds in that area, separate from the rest of the garden rotation.

Knowing that is the wet corner, I have basket willow and hazelnut (filbert) trees planted in that area of the garden. Take time to research plants that do well in wetlands or rain gardens. In my smaller garden I was happy to acquire some Siberian irises for the wet area when a friend was giving some away. During one year of heavy rainfall, cattails showed up uninvited in a wet area. These things are great for my borders, and I believe having a wetlands is good for any ecosystem, however, I would really like to get some vegetable production out of that garden bed in the northwest corner of my garden that is 12” lower than the other side of the garden.

I am considering building the height of the bed with hugelkultur. Hugelkultur is basically a compost pile with a thick base of wood, sequestering carbon in the soil for the long term. Sepp Holzer promotes this technique in his book Sepp Holzer’s Permaculture: A Practical Guide to Small-Scale, Integrative Farming and Gardening. I wouldn’t want to use wood big enough to burn in our wood stove, but we have some brush piles around here—a result of some much needed pruning of our bushes and trees. I could move that brush to the low bed, adding garden weeds and other green material as I go along. Some soil will most likely go into the building, but most of the soil will be on the top layer. Hopefully, this summer or fall we’ll be digging out the area where the garden washing station is and putting down pavers. I’m not in a hurry to do this work (on the garden bed or the pavers), so whenever (and if)  it happens, the soil will go to the brush pile/compost pile that is on the low bed. I already build compost piles on some of my beds with the finished compost being distributed each season. What goes into a hugelkultur bed stays there. I would have to build the pile much taller than I want the finished height of the bed to be. Just as a compost pile is reduced to a lower level in the process, this bed would become shorter, also.

Homeplace EarthOn the other hand, cattails would be at home in that spot, just as it is, and wouldn’t involve nearly so much energy on my part. There are always choices and things to learn in a garden.

Read Full Post »

green and brown cotton bolls with spindleI usually write about food crops and soil building, but today I’m talking about fiber. I have begun to grow cotton and have learned to spin it using a spindle. Growing and using cotton is more than just a new craft for me. It adds diversity to my garden, which is important in a permaculture garden, and it helps me connect with factors beyond the garden. Plants are grown around the world for more things than food. If our gardens are to provide for us and if we are ever going to be free from corporate domination, we need to consider everything. From our plants we can get food, fuel, medicine, fiber, dyes, and so on. The movement to make available food grown in a sustainable manner to everyone is gaining momentum. What about obtaining our other needs from sustainable sources?       

When India was a colony of Britain, Indian cotton was shipped to Britain and the Indians had to buy it back as fabric. Gandhi promoted spinning as an act of independence. If the Indians spun and used their own cotton, they would be free of British control of that resource. In fact, Gandhi had a contest to develop a small spinning wheel that was portable enough that people could easily spin in public and the box charka was born. What better act of nonviolent protest but to spin cotton into thread and yarn in public! Unfortunately, today Indian cotton farmers face another peril with the introduction of GMO cotton seeds. In 2000 I heard Vandana Shiva speak about the number of suicides among cotton farmers in India. They had been convinced to grow GMO cotton by Monsanto and things were not going well. The problems continue to this day. Please take the time to listen to her tell you about it here. Shiva’s organization Navdanya goes into these areas with open pollinated seeds to help the farm families recover.

In doing some research for this post I was heartened to find that there are projects underway to promote the sustainable growing of cotton around the world and in the U.S. You can find more about that at http://www.sustainablecottons.com/. Where is the fabric coming from for your cotton clothes? Begin looking for a Fairtrade label for cotton. Also, consider how the cotton you buy gets its color. Cotton grows naturally in more colors than white. Pakucho is the brand name of cotton from a project developed in Peru to revive the growing of colored cotton on small farms.

green cotton fiber and seeds--BLOG

1 ounce green cotton fiber/seeds

In 2004 I came across an article in Spin-Off magazine about a woman who had grown the cotton that she then spun (with a spindle) and wove into fabric for a shirt. You can read “My Cotton Shirt” here. At least I knew that my idea of growing cotton and making a shirt out of it wasn’t totally crazy. I did grow some cotton around that time, but I didn’t know anyone who was spinning cotton and I was busy with other things, so the harvest was stored away. The only spinners I knew worked with wool and said that, since cotton had such a short fiber, it was really hard to spin. I figured that if spinning cotton was all I knew, spinning cotton would be my normal and that wouldn’t be a problem. After all, people have spun cotton down through the ages so I should be able to learn this. For the past two summers I grew both Erlene’s Green and Nankeen Brown cotton. The seeds came from Southern Exposure Seed Exchange the first year and I saved them after that. There are a lot of seeds in cotton. In one ounce of green cotton that I weighed, 75% of that ounce was 185 seeds and 25% of that ounce was fiber.   

I turned to Joan Ruane to learn to spin the fiber into yarn, once I found her video Cotton Spinning With the Takli. A takli spindle is what is recommended for cotton and that’s what I’ve been using. My husband gave me her kit with fiber, spindle, and DVD as a gift and it was a great way to get started. It was very slow going at first, though. I had to remind myself of how it was when I taught myself to knit—only this seemed harder. Clothos Handspinners, a group of wonderful folks into handspinning, came to my rescue. At the first meeting I attended in November, 2011, Judith spent time teaching me some basics and I will be forever grateful. Most of the members show up with their spinning wheels, but there are some, like me, who are using a spindle. Most work in wool, but not exclusively. I am not interested in getting a wheel right now because I want to master the spindle. Besides, I want to see how much skill and knowledge I can gain with the least money spent. Another DVD that has helped me is Spinning Cotton by Stephanie Gaustad. If my garden DVDs have helped people as much as these cotton DVDs have helped me, I will be happy. My goal is to make a vest out of my homegrown, homespun cotton, so I’ll be learning to weave next. After that comes the shirt.

seeds and green spun cotton from 1 ounce fiber/seeds--plus spindle

seeds and green spun cotton from 1 ounce fiber/seeds–plus spindle

Cotton needs hot weather and a lot of sun. The varieties I grow take 130 days to mature, but it differs by variety. Sea Island White  requires 160 days. Start the seeds and set out transplants as you would tomatoes. I’ve heard of growing cotton in containers and bringing it inside when the weather turns cold if you live in a marginal climate. In my 2012 garden I harvested 2.5 pounds of green fiber and seed in an 80 ft.² bed. That works out to about .75 lb. fiber per 100 ft.² (and lots of seeds). The brown cotton harvest was equivalent to one pound fiber per 100 ft². I had 7-12 bolls on each plant. Now that I’m paying attention, I believe that I can better that harvest. The U.S. average is 1.7 pounds fiber per 100 ft². You could begin with just a few plants among your flowers.

knitted homegrown cotton sampleGrowing colored cotton has been really interesting. After cotton has been spun, it needs to be boiled to set the twist. When you do that, the color deepens. The green spun cotton shown with the spindle and seeds is the same cotton that is shown as fiber in the other photo with the seeds. In the sample that I’ve knitted, the deep green and brown colors are the natural colors after boiling the spun fiber. The white is what I grew years ago with only an inkling of an idea that I might want to do this sometime.

In 2007 a new charka was introduced in India. This e-charka allows the spinner to produce electricity while he/she spins. A battery stores the electricity to operate an LED light and a transistor radio. Spinning cotton by hand is still important in rural areas of India and elsewhere and this new charka will increase the quality of life for these spinners. Gandhi would be proud. For now, at least, I’ll stick with my spindle. Growing cotton and learning to spin it is a wonderful project. Doing it with children gives them a great glimpse into history. There are so many things you could talk about with them when you are working with the plants and fiber. As you spin your own homegrown fiber, keep in mind all those farmers who are keeping the old skills and seeds alive. Every good thought we have goes out as a ripple that eventually connects us all.Homeplace Earth

For more thoughts on growing and spinning cotton see http://www.motherearthnews.com/permaculture/grow-spin-cotton.aspx#axzz2LRWabZ00

Read Full Post »

Growing Protein--BLOGWhen we think of protein foods we normally think of meat, dairy and eggs. However, we can also get protein from plants. Beans and grains contain the most, but there is some protein in all vegetables. Of course, if you depended on a plant-based diet for your protein, you would be wise to look to the concentrated plant sources for your needs, unless you are eating a really large amount of food.

Protein is used by the body for building and maintaining. It stands to reason if you are pregnant or nursing, or have been injured and need to repair tissue, your protein requirements would be higher than the recommended daily allowance of 46 grams/day for women and 56 grams/day for men. In my last post I talked about growing potatoes for needed calories. Potatoes have 7.7 grams of protein per pound, so if you ate a considerable amount of potatoes, you would also be racking up the protein. Carol Deppe spent a winter eating a lot of potatoes and wrote about it at http://caroldeppe.com/ThePotatoBin.html. On the other hand, if you ate corn and beans for protein, you would get about 40 grams of protein for each pound of corn you ate and over 100 grams per pound of dry beans. In addition to potatoes, Deppe grows her own beans and corn. If you are interested in growing a significant part of your diet, her book The Resilient Gardener needs to be on your reading list. 

Protein is made up of amino acids, many of which can be synthesized by the body, if enough nitrogen (protein) is available. However, there are eight amino acids, referred to as essential amino acids, that need to come from the food we eat. Animal sources have all the essential amino acids and plant sources do not. Interestingly enough, the ones the legumes (peas and beans) are lacking are the ones that the grains have plenty of, and vice versa. There are reasons for the traditional meals such as cornbread and beans, tortillas with beans, and beans and rice. Even peanut butter on whole wheat bread serves to give you the right combination. Beans and grains don’t need to be eaten at the same meal to get the benefit, but they both need to be in your diet somewhere.

Besides protein and calories, including grains in your garden plan provides carbon in the form of stalks and straw for compost making, necessary for feeding the soil without bringing compost materials in. In my garden I have straw from wheat and rye in June and from cornstalks in the fall for compost. Besides the straw from wheat and rye, much organic matter is left in the soil from their decomposing roots. The legumes are soil enriching crops, leaving behind nitrogen for the next crop. The most nitrogen is left in the soil if the legume crop is harvested at flowering, as you would if you were growing it only as a compost crop. After that, nitrogen is put toward producing the beans or peas. Nevertheless, some nitrogen stays behind and it is good to have legumes in your rotation.     

Other protein sources from your garden are peanuts and sunflowers seeds.  I harvest peanuts before the frost kills the vines, hanging them in the barn for the peanuts to dry on the vines. I pick off the peanuts when they are ready. You can see that in my DVD Cover Crops and Compost Crops IN Your Garden. The vines become compost material, but that peanut hay could also feed small livestock. Peanuts and sunflower seeds contain 117.9 and 108.9 grams of protein per pound respectively. These crops also supply needed fat in your diet. In addition, they can be used for cooking oil. More information about that is at my post https://homeplaceearth.wordpress.com/2012/07/10/using-a-piteba-oil-press/. Sunflower stalks, like the cornstalks, are used in the compost. 

In a permaculture garden you might have hazelnut (filbert) trees. Hazelnuts have 57.2 grams of protein per pound. My hazelnuts form a border on the north side of my garden. I wrote about hazelnuts at https://homeplaceearth.wordpress.com/2012/03/20/hazelnuts-filberts-in-my-garden/. Hazelnuts trees can be pruned, with the trimmings feeding your rocket stove. These nuts also provide fat in your diet and can be pressed for oil. 

 Okay, I know you aren’t going to be eating a pound of beans or corn at a meal. In terms more easy to understand, a cup of boiled cowpeas (the beans I grow) has 13.3 grams of protein. I use ½ cup cornmeal, cooked with milk or water for a good-sized serving of cereal. That cornmeal has 5 grams of protein. A thick slice of homemade whole wheat bread has 3.9 grams of protein. A one ounce serving of peanuts has 7.4 grams. By comparison, a cup of milk contains 8 grams of protein and one large egg contains 6.3 grams. 

If you have enough calories in a varied homegrown diet, most likely you are getting enough protein. As you can see, growing grains for compost naturally gives you protein foods. If you were growing a significant part of your diet, you would also be concerned with having enough calcium. That’s the topic for next time.


More about Growing Protein at http://www.motherearthnews.com/permaculture/growing-protein.aspx.

Read Full Post »

dried food in jars-2012-BLOGThis is my third summer using solar food dryers and they have become a firm part of my food preservation plan. Of course, the biggest aspect of my plan is to need as little preservation as possible. So, we eat as much as we are able to out of the garden all year. Next is to grow crops that pretty much store themselves. That would be things like onions, garlic, winter squash, potatoes, sweet potatoes, cowpeas, hazelnuts, and peanuts. Some things are fermented, particularly cucumbers and cabbage. I’ve had a huge jar of dill pickles on my kitchen counter for most of the summer, sort of like what you might see in a deli. We take pickles out whenever we want. Some of the snap beans get salted in a crock. The rest of the snap beans and extra tomatoes are canned. 

principe borghese-BLOG

Principe Borghese tomatoes

The crop that I dry the most is tomatoes. There are varieties that are better suited for this and I’ve been growing some. Principe Borghese (preen-see-pee bore-gay-zee) has been the most prolific so far. I had a harvest of about 75 pounds from the plants that grew along a 16’ livestock panel. Principe Borghese is a determinate variety, pumping out the whole harvest in 5-6 weeks. The seed catalog says the days to maturity for this variety is 78 days, however, I’ve found my harvest begins at about 60 days from transplanting and I had my first tomatoes before July 4th this year, without even trying.  These tomatoes look like large cherry tomatoes. Sometimes I cut them in half to dry and sometimes I cut them in quarters. 

I also grew Hungarian Paste tomatoes, another determinate variety. I began harvesting these about 18 days later than Principe Borghese and picked for only 4 weeks. That was too short of a harvest window for me, but the blister beetles had moved in on the plants. This variety is similar to Roma and Amish Paste. I had some trouble with blossom end rot on the first flush this year, which might have been caused by weird weather; however, blossom end rot has been a problem with this type of paste tomato on the first flush in my garden in other years.  I’ve had my soil tested and calcium deficiency is not the problem.

long tom-closeup-BLOG

Long Tom tomatoes

A new variety, for me at least, is Long Tom, an indeterminate. I only have a few plants and they were put in late, but I’m really impressed with the tomatoes I’m getting. It could be due to the bed they are in, but these meaty tomatoes have been weighing 4 ounces each! If you don’t like seeds in your dried tomatoes, this is the variety to grow. I’ll pay more attention to Long Toms next year. All these varieties and more are available through the Southern Exposure Seed Exchange catalog.

The list of things I’ve dried in my solar dryers is: apples, cabbage, celery, collards, grapes, kale, mushrooms, okra, onions, parsley, peaches, peppers, sweet potatoes, tomatoes, and zucchini. I’ve dried snap beans, but I found we just don’t eat them. They are good, however, reconstituted in chicken broth. One of the good things about drying is that you don’t need to have the quantity that you need when you are canning. You can put small amounts of this and that in the dryers. I’ve found that I can salt the snap beans in a crock and add to it over the next couple weeks as the harvest comes in, otherwise if I had a small amount, they’d go in the dryer.

SW trays open-BLOGASU dryer inside-BLOGI have two dryers and each have special features. One, the SunWorks model, exposes the food to the sun. Historically, that’s how things were dried, lying out in the sun. The larger model, based on plans developed by Appalachian State University (ASU), does not expose the food to the sun. If I’m drying mushrooms, I put them in the SunWorks dryer since mushrooms really develop a lot of vitamin D when exposed to the sun. If I’m drying collards or kale, I put them in the ASU dryer. The greens dry quickly in either one, but they stay greener out of the sun. I built the SunWorks dryer with an electric backup option. I played with that a little that first year, but haven’t plugged it in since. If the weather takes a turn and it rains, I just leave the food in until the sun comes back out and it dries. When drying is complete, I put the food in glass canning jars and store them on shelves in my pantry. Of course, if the weather promises to be rainy and damp for days, which is the pattern we seem to be in at the moment, I resort to canning.

You can find more information about my solar dryers at my blog posts Solar Food Dryers and Solar Food Dryers-Update. The Solar Food Dryer, a book by Eben Fodor, was my guide in making the SunWorks dryer. A good book to refer to in handling the food is Making & Using Dried Foods by Phyllis Hobson. I’ll have both books for sale at my booth at the Heritage Harvest Festival at Monticello on September 15 and at the Mother Earth News Fair at Seven Springs, Pennsylvania on September 21-23. I’ll also be speaking on Solar Food Drying at both events.  See you there!


Read Full Post »

Cindy washing lettuce-BLOGIt never occurred to me to have a place to wash my harvest in the garden until I began selling vegetables. Until then, I would bring everything into the kitchen to clean, since I would be preparing it for our table or to preserve it. In 1992 I began selling produce, primarily lettuce, to two local restaurants. It was time to set up a place to wash it outside.

We happened to have a bathtub sitting in the backyard, having replaced it when we remodeled the bathroom. I put it on cement blocks so the top was a workable height. A screen that I made of 2×4’s and ½” hardware cloth fit over the top. Now I could lay things on that screen and hose them off, with the water being caught in the tub and draining into the bucket I put under the drain hole. This water would be returned to the garden. I would line up multiple buckets and keep changing them out as they filled.

Sunfield washing station-BLOGI built a bench out of scrap wood to hold 5-gallon buckets and harvest trays. That and a drinking-water-safe hose was my set-up. When I sold leaf lettuce by the head, packed in boxes, I would hold each head by the bottom and dip it upside down in first one bucket of water, then another. Doing that allowed any dirt or slugs that were in there to fall out. The buckets were food-safe and kept as clean as if I were using them in my kitchen. I put the lettuce heads on the screen over the tub and hosed them off again. They drained there before I packed them into cardboard boxes to take directly to the restaurants. When I had the CSA and later sold at the farmers markets, I sold bagged lettuce. I used three 5-gallon buckets and put only the trimmed leaves in. By the time they had been through three buckets, the leaves were clean and I put them directly into a salad spinner to get out excess water. I bought a 5-gallon salad spinner like the one I saw in the restaurants. That used spinner cost me $100 at a restaurant supply dealer, half of what I saw a new one for at the time in Johnny’s catalog. It made my job easier.

I had acquired some plastic trays that bakeries use to deliver bread to stores. I would pick my harvest into them and take it to the washing station. With things like tomatoes and peppers, I would just set the tray on top of the screen and hose off the produce, turning it with my hand as needed. Then I would take the trays to the porch and set them on the porch swing or arms of the rocking chairs to drain. It was shady on the porch, a good place to sort the produce. A piece of hardware cloth with ¼” spaces was put in the bottom of the tray if it was used for green beans or cherry tomatoes, to keep those things from falling through the holes. The produce was on its way to the customers in a short time or using the porch would have become a problem with the family coming and going.

Washing produce with a hose is wet work. A heavy duty vinyl apron from Nasco and heavy rubber gloves protected me from getting waterlogged and from the chill in the spring and fall. In the summer, an occasional splash from the rinse water was a welcome cool-off. The Nasco catalog said the apron was the kind used in dairies. I used that apron for the whole ten years I sold vegetables.

I’ve come to believe that a washing station in your garden is a good thing to have even if you are only growing for your family. It certainly saves a mess in the kitchen. You may not do all your washing there, but you can certainly do the messiest stuff there. If you are selling vegetables and you use your kitchen for washing, you are putting more stress on you and your family than is necessary, not to mention the mess.

sink and drying trays-BLOGThat old tub that I used as the base of my operation eventually had to be hauled off to the dump. Installed in an add-on bathroom by a former owner who did things on the cheap, it was plastic and covered with styrofoam. Although I wasn’t selling vegetables anymore, I had gotten used to having a washing station and wanted to put together another one. Sometime over the years, I had found a stainless steel free-standing sink at a yard sale. Two years ago I put it in the garden and plumbed it to a hose (drinking- water-safe) from a pipe sticking out the back. That gave me running water without holding a hose! I could still collect the water from the sink in buckets. One of the greatest things about a garden washing station is being able to use the wash water to water the garden.  These days, I’m not washing loads of lettuce, but I am washing and cutting produce for the solar dryers. Some of my best days are when I can pick, wash, and cut the produce and load it in the drying trays, right in the garden. I feel the fresh air and hear the birds singing. The produce never comes in the house until I take it off the dryer trays and put it in the jars. I suppose I could do that in the garden, also, and clean the trays in the garden sink.

My first set-up was on the east side of the garden with morning shade from a nearby maple tree. I was usually done washing in the morning by 10:30am and didn’t begin harvest in the evening until 6:30 pm, when the sun began to be softened by the trees on the other side of the garden. If I used that space during the heat of the day, it was to quickly rinse tomatoes, peppers, or beans before bringing them to the porch.  To provide some protection from the sun in my new space, we recently built a structure out of bamboo. This thing may not last long, although I’m hoping to get at least a year out of it. We had bamboo we had to clear out, so we thought we’d have some fun. It will help us decide how we want a permanent structure when we get around to it. The permanent one will most likely have a tin roof.

Santa Cruz garden washing station-BLOGIn 2001 we visited the gardens at the University of California-Santa Cruz and found this washing station. Having it against a building makes it easier to add a roof. A wall provides a place to hang things, such as colanders, and maybe shelf space. I know of one market gardener who had added a roofed, room-sized area behind her garage for washing and packing. It was open on three sides and it had a door into the garage where she stored the produce in refrigerators. If you are selling produce, be sure to plan a space for sorting and packing and for the packing materials. Taking over the family porch for that, although convenient, is not always the best thing to do.

Anyone out there with a garden washing station you’d like to tell us about?

Read Full Post »

Piteba oil press-BLOGOnce you really begin to plan how to eat a homegrown/local diet you will soon realize that cooking oil is something that is not coming out of your garden or is available from local growers, unless you live in California in olive territory. If animal products are in your diet, that could be a source of fat. I buy bacon locally from a farmer who raises his hogs on pasture and save the drippings for cooking with. Having homegrown oil, however, would be nice, and it just happened that I visited Lehman’s Hardware in 2010 when they first began to carry the Piteba oil press. I bought one and played with it long enough to know that I needed to spend more time learning all the ins and outs to put it to the best use. I was busy building my solar dryers and learning more about them, however, so the oilseed press got put aside. With my 2011 hazelnut harvest and homegrown peanuts, I decided it was time to get it out. Another source for the Piteba is Bountiful Gardens.

The photo shows it all set for action. The press comes with a small bottle with a wick that holds colored lamp oil that you provide. The first photo shows blue lamp oil, but in the closeup photo you can’t see colored oil because it is almost empty. You also need to provide a container to catch your pressed oil as it drips from the slot. Unfortunately, a jelly jar is too wide to fit the space, but I have a small juice glass that is just the right size. There is a small hole in the frame where that glass sets. A funnel could be placed there with a tube that leads to a larger container. You also need to provide the seed hopper, made from a soda bottle. I used a bread pan to catch the oilseed cake after it was pressed.

The small lamp heats up the press cage to help with the oil flow. Light it 10 minutes before you begin pressing. Once things are flowing well, you might be able to extinguish it. Beware! Only have the wick showing the slightest bit or the flame will be too big. If it is too big and you have to adjust the wick, DO NOT grab the wick holder with your fingers while it is hot! Wait until it cools. I’m speaking from experience here.

The first time I used my press I tried some old sunflower seeds that I had here. They were the striped culinary ones, not the black oilseed variety that you should use for oil. Being old they were probably somewhat dry and they immediately stopped it up. The handle stopped turning easily, in fact, it became impossible to turn. When that happens, and it will, you need to take off the large cap and the adjustment bolt. If you’ve had the lamp lit, they will be hot, which is why I keep handy a ¾” wrench to use for the adjustment bolt and a monkey wrench for the cap. Take them off and immediately clean out the cap. You will need a knife to dislodge all the packed seed residue. Wash everything thoroughly, making sure the threads of the cap are clean.   If your seeds are too dry, the directions suggest mixing some water with them and leaving them in a plastic bag for two days, then try again.

Immediately after using the Piteba, dismantle and clean it. If you wait, the press cake inside will become hard as stone. If that happens, you can soak everything in water until it softens enough to take apart. Depending on how it is, you may need to leave it soaking overnight, but it will soften enough to clean. Be sure to read all the directions. There is a washer that needs to be coated with edible oil before it goes on the expeller screw when you put it all together to use.

You can go to the health food store and buy any number of seeds to try in the Piteba. There is a performance chart available on the Piteba website that allows you to compare the percent of oil in various seeds. If push came to shove, however, and you needed to provide cooking oil for your household, you would do well to learn as much as you can about using seeds you can grow or find locally. Keep in mind that these seeds aren’t as convenient as the ones from the store. You will need to clean and process them yourself. If you are using sunflower or pumpkin seeds, use oilseed varieties. The seeds of oilseed pumpkins are hulless. The seeds from oilseed varieties of sunflowers are black.

Piteba oil press-closeup-BLOG

pressing homegrown peanuts

I was anxious to press my homegrown hazelnuts and peanuts. It took forever to shell the hazelnuts, since my nuts are the small native variety. Find out more about growing hazelnuts at Hazelnuts / Filberts In My Garden. The yield for one cup of homegrown hazelnuts, weighing 5 ounces, was 3⅓ tablespoons oil. The yield for one cup of homegrown peanuts, weighing 6 ounces, was 4 tablespoons oil. I used my Master Nut Cracker for the shelling for both the hazelnuts and peanuts. The peanuts went pretty fast with that. I’ll be writing about that nut cracker one of these days.

If you wanted to produce enough oil for one tablespoon a day per person, you would need 1.4 gallons of oil per person per year. In the Master Charts in How To Grow More Vegetables (HTGMV) by John Jeavons, the beginning yield for peanuts is 4 pounds per 100 ft² and the intermediate yield is 10 pounds. The average U.S. yield for peanuts is 7.2 pounds per 100 ft². Let’s consider the conservative 4 pound yield. I need to sow about 8 ounces of peanuts for each 100 ft² planting, so a yield of 4 pounds leaves 3.5 pounds for eating or pressing for oil. At that rate it would take 960 ft² to grow peanuts to produce 1.4 gallons of oil, plus the seed to plant back. Just think, if you had that 7.2 pound U.S. average, it would only take 500 ft². I battle the voles at my place, so my best yield of peanuts has been 3.75 lb. per 100 ft². I’ll have to see what I can do to get my peanut yield up. The HTGMV beginning yield for hazelnuts is 7 pounds per 100 ft² planting. Since hazelnut trees are perennial, you don’t have to save out any seed to plant back, however, some trees may not produce every year.

primitive oilseed press-BLOG

primitive oilseed press

In 2008 I took this picture of a primitive oilseed press. I don’t know any more about it than what you see in the picture.The seeds are in a small basket. We were at a folklife festival and came upon it at the end of the day. The only person around was a volunteer who said it was for pressing seeds for oil. If you don’t have a Piteba, it might give you some ideas. In The Self-Sufficient Life and How To Live It, John Seymour suggests using a cider press to extract the oil from seeds. You would need to crush the seeds, then wrap them in a cloth. Obviously, you would need to work with a larger quantity of seeds. It might be, now that you have taken a closer look at what’s involved to produce your cooking oil, you might adjust your diet to use less than before. Steaming vegetables might become more desirable than stir-frying. Last week I used my solar oven to bake some snap beans, potatoes, and garlic together with only 1 tablespoon of my newly pressed oil drizzled over the vegetables. It was delicious.

Read Full Post »

arbor and gate-BLOG

arbor and gate

Livestock panels, sometimes known as cattle panels or hog panels, have many uses in the garden.  They are 16’ long and 36”(hog)-52” high.  The spacing between the heavy wires in the ones I have is 6”x8”.  Some panels have closer spacing near the bottom.  I first learned about them as animal fencing, but they prove quite handy to have in the garden.  Although the panel itself can flex, it is a strong fencing that does not need tightening. 

In the picture you can see my garden gate and grape arbor, both made from the panels.  To bend a panel into the arbor shape, lay it on the ground and have someone hold one end or anchor it in some way.  Pick up the other end and walk toward the first end.  It’s that easy.  We needed more height in the arbor than the 16’ panel would provide, so we put it on top of two rows of bricks on each side.  Rebar is  inserted into the ground through holes in the bricks.  The panel is wired to the part of the rebar sticking up from the ground.  You can find these panels at farm supply stores.  You can find rebar at home building supply stores in the area where they display cement blocks.  To see how this arbor looks when the grapes are in full production, go to my March 6, 2012 post On Growing All Your Own Food.

bolt cutters and hacksaw-BLOG

bolt cutters and hacksaw

The panels can be cut with bolt cutters or a hacksaw.  I cut one to make my gate.  I have wired ½” hardware cloth to the lower half of the gate to keep rabbits out.  An earlier attempt at rabbit control was to weave bamboo through the spaces.  If I have enough bamboo strips there, it works. However, I need to keep after it.  When I came across the hardware cloth, I went with it.  There is no hinge or latch here.  The gate fits between the arbor and fencepost on the hinge side.  On the latch side it just leans against the regular fence.  We have plans for putting new posts in that garden entrance and this gate, put up several years ago, was only meant to be temporary.      

I also use the panels as a trellis for garden crops, particularly tomatoes.  I put a fence post on each end and one in the middle.  Baling twine often serves to hold it to the posts.  The panel goes down the middle of my 4’ wide bed and the tomatoes, planted at the base, are just woven through the spaces as they grow.  In that wide bed there is still space on the sides for carrots, basil, parsley, or just heavy mulch.  Tomatoes can do without a trellis as sturdy as a livestock panel and I also use old field fencing to trellis tomatoes.  The panels, however, present a neater appearance.  These trellises stay in the garden all year.  In the fall, when I’m planting cover crops, I move them to where they are needed the next year and set them up.  I can do this because I have no need to till the beds before planting tomatoes, or whatever it is that the trellis will be supporting.  I just cut the cover crop with a sickle and let it lie as mulch or remove the biomass to the compost pile.  The bed is ready for the next crop with the trellis already in place.

greenhouse-BLOG

greenhouse from livestock panels

These panels are great for making structures, like small greenhouses.  The photo shows the greenhouse our daughter Betsy made for her Arkansas garden.  You can also see it in Betsy’s segment of Develop a Sustainable Vegetable Garden Plan.  She built a wood frame for the base and used wood to frame a door on one end and a vent window on the other.  You could use the panels against the side of a building as a lean-to structure and build something taller.

Of course, you could actually use these panels for their intended purpose, controlling livestock.  They make good temporary or permanent pens.  Beware of using them with young goats developing horns.  The goats might get their heads stuck.  Once the goats and their horns grow enough, that’s not a problem.  If that does happen, don’t panic.  Cut the fence with bolt cutters or a hacksaw, preferably with the bolt cutters.  You can mend it by using wire to close up the space.  I have a leftover spool of aluminum electric fence wire that I cut and use as twistees to hold the fence to metal posts.  Baling twine works, as does plastic zip-ties.  The panels are good barriers for most dogs, goats, cattle, pigs, etc.  Chickens, however, can slip through, as well as other small critters, such as skunks, rabbits, and opposums.  You can add chicken wire or other fencing to the panels to keep out the smaller creatures. 

goats clearing the way-BLOG

goats clearing the way

Betsy and her husband, Chris,  are using livestock panels as movable fencing with their goats to clear a future fenceline.  They gradually move the pens down an overgrown area on the side of a field.  Sometimes the panels are tied to trees and they are flexible enough to curve around obstacles, if necessary.  Betsy and Chris use as few posts as they can get away with, since they have to move them regularly.  The ends are put together with clips, similar to carabiners.  Besides just connecting the ends, the clips can act as hinges, or as latches if that’s where they decide they need a gate to be.  You can see the great job the goats are doing clearing the brush by the trees.  Goats love eating brush better than grass.  This is a great use of both the goats and the fence panels.  

Getting these 16’ fence panels home from your farm supply store might pose a problem.  I’ve used a pick-up truck with an 8’ bed, putting one end inside the tailgate, extending the panel over the truck cab, and tying the other end to the front bumper.  I wasn’t going far.  If you do that, protect the top of the truck with a piece of cardboard or old blanket.  If you buy enough, you could have them delivered.  If you are going to cut them into shorter lengths anyway, you could do it right there and make getting them home easier.

Some of you reading this may have already been using these fence panels on your homesteads and have plenty of ideas and uses of your own.  If you would like to share them, I welcome your comments.  If you are using these panels for the first time, good luck, have a good time, and let us know how it goes.

Read Full Post »
Older Posts »