Feeds:
Posts
Comments

Posts Tagged ‘cover crops’

Cindy in Cotton Project dress - BLOGYou haven’t heard from me for awhile, but not to worry. I am alive and well and have been busy working on fiber projects. In 2019 I made a dress from my homegrown cotton and flax/linen that won Best in Show at the Fall Fiber Festival at Montpelier Station, Virginia. The photo shows me in that dress and the shirt made from homegrown cotton and flax/linen. I have always said that we are living in exciting times. I think I will change that to we are living in crazy times. I could never have anticipated the conditions we are living in now, and that is why I am writing.

market garden012--BLOGWith so many people at home and spring springing, it would be natural to think of starting a garden. It is a big endeavor to undertake and a lot to learn. Learning is the key here. Children are home and, since you need to be the teacher, you might as well teach them how to feed themselves. I would imagine all the subjects they need to keep sharp in will be covered while you and your children decide what you want to eat, what will grow in your area, how many seeds to order, how to lay out your garden, and the list goes on and on. I taught people how to plan a garden to feed themselves at our local community college for over a decade and know that it is a lot to process in a short time.

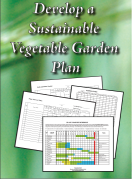
homeplaceearth imageBesides feeding ourselves, we also need to consider the soil and to grow cover crops to feed back to it. I produced the DVD Cover Crops and Compost Crops IN Your Garden to teach that part. As for the garden planning, I produced the DVD Develop a Sustainable Vegetable Garden garden plan dvd coverPlan. That video shows how to put together a notebook with your complete plan, thinking through all you need to do. It includes a CD with the planning sheets I developed for my college classes. I have also written the book Grow a Sustainable Diet that has information that you will be introduced to in the DVDs, plus more about planning your diet and considerations for planning your permaculture homestead.

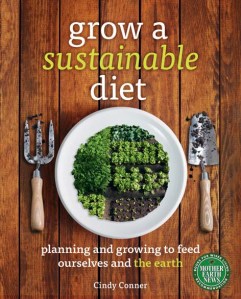
grow a sustainable diet coverI made these videos and wrote the book so that people who couldn’t take my classes could have access to the material for their own education. Together you have the book, lectures, handouts (worksheets), and field trips. You see me in my garden and, in the garden planning video, you see seven other gardens and the gardeners who manage them. They range from a very small backyard garden to a half-acre market garden. These materials are part of the curriculum at the college, but you can use them to learn at home.

If you want to take this journey, the DVDs and book are available from my website at www.HomeplaceEarth.com. You’ll see that I’ve also written Seed Libraries. Maybe some of you experienced gardeners may find that helpful to start a seed sharing program in your community. The complete name of that book is Seed Libraries and other means of keeping the seeds in the hands of the people. Besides these basic learning materials to get you started, you will find free continuing education in past posts at this blog. 

I hope you take time in our rapidly changing world to slow down, catch your breath, and enjoy the unique opportunity that is facing you right now. Plant a garden and enjoy where it takes you.
homeplace earth logo


Read Full Post »

taking a soil testOver the years, whenever anyone asked me for advice on organic gardening, my response has always been Feed the Soil and Build the Ecosystem. Often they were expecting recommendations on what amendment or pest control product to use. However, you need to look at the whole system, rather than addressing symptoms of imbalance as they pop up. Now that permaculture is becoming more widely publicized, whole system management is more well known

Feed the Soil—Now is a good time to take a soil sample. I send my soil samples to Waypoint Analytical, formerly A & L Eastern Labs. If you are not good at interpreting the results that they send you, you could contact John Beeby at www.growyoursoil.org for organic fertilizer recommendations. Check with his website for which test to request and where to have it done. You will need to sample the soil from many places in your garden, then mix everything together for your sample to send in. The soil you see in the photo looks really good, but remember that I have been working on my soil for many years.

Correcting imbalances in your soil is the first thing to do if you are not receiving the results you want in your garden. Sometimes, well meaning actions can lead to imbalances, including adding a lot of manure to your garden every year without testing first. Sometimes people lime every year because they assume it is a good thing. It is only good if your garden needs more lime. Even if you do not do a soil test each year, you should have one to use as a baseline, then do one a couple years later to see how things are going. Make cover crops a part of your soil building efforts. The organic matter they add with their roots, and with the plant matter you harvest and use as mulch or compost material, is a tremendous benefit.

Build the Ecosystem—Well-nourished soil cannot go it alone in producing good crops. Malnourished plants will attract insects that will take them out, for sure. However, even well- nourished plants need pollinators. Also, if there are any insects munching your plants, you want to have beneficial insects taking up residence in your garden to eat them. In order for the beneficials to stay, there needs to be some other insects around as food. Buying insects to add to your garden is not as effective as attracting and naturally growing your own,

Chemicals, even those approved for organic production, can harm beneficial insects, as well as the not-so-desired ones. Furthermore, you have to acquire and apply the chemicals. If you include plants that attract the good insects into your crop mix, all you have to do is to stand back and watch the show. That’s what happened when I planted mountain mint, as well as other plants in the margins of my garden. I had visitors to my garden this summer who stopped in their tracks and asked the name of the plant when they saw all the buzzing around the mountain mint. It was an insect frenzy! Tansy is also well-documented as attracting beneficial insects.

goldenrod with honeybees and butterflies

Goldenrod with honeybees and butterflies.

The best time to witness beneficial insects on your plants is between 10am and 2pm in your garden. Goldenrod grows up in the wild areas of my garden if I don’t cut it down through the season. Since I am getting interested in natural dyes, I cut some for a dyepot recently. When I went out with my clippers, there were so many insects buzzing around it that I backed off. I did take some where there was little action going on, but left the rest to the beneficials.

leatherwing on spearmint

Leatherwing on spearmint.

You can also experience all this by letting some of your regular garden plants, such as basil, flower and go to seed. Spearmint, which can take over if you are not careful, attracts many beneficials if you let it flower. I like to have celery come back each year and go to seed. On the way to making seed that I save for culinary use and replanting, the flowers attract an array of good bugs–and all I have to do is watch it happen. Besides the insects you see in these photos, you will see bumblebees, wasps, beetles, spiders, and more in your garden if you allow it to happen.

Assasssin bug babies

Assassin bug babies.

Learn to identify insects you find in your garden so you don’t freak out and destroy the good ones you see that might surprise you, such as the assassin bugs in this photo. I found this young family on my cowpea plants. Although I’ve found ladybugs on other plants, my favorite ladybug photo is one I took on a cowpea plant of a ladybug eating an aphid.

ladybug eating an aphid

Ladybug eating an aphid.

To attract many of these good insects, you need to have permanent plantings. Weedy fencerows can provide  habitat. Not tilling all your garden at once will help, as well as having permanent paths. A border with permanent plantings will provide overwintering habitat. These things will enhance the year-round beauty of your garden and will be less work for you in the long run. The book Great Garden Companions by Sally Jean Cunningham is a good reference to consult if you want help deciding what to plant to attract specific insects to help with certain pests.

Now is a great time to make your 2018 garden plan to ensure that you plant the desired cover crop, considering what your following crop will be, in each bed for next year. I locate my compost piles on my garden beds and rotate them, along with my other crops to contribute to soil fertility. The advantage of that is evident in the crops that follow. Managing your plantings to attract and maintain beneficial insects in your ecosystem will create a garden that is a joy to be in.homeplace earth logo

Read Full Post »

SeedLibraries covergrow a sustainable diet coverAfter being away from this blog since I broke my wrist in March, I’m back! To celebrate my return, I am offering a 25% discount through January 1, 2017 on my cover crop and garden plan DVDs and on my books Grow a Sustainable Diet and Seed Libraries. As always, shipping is free in the US. My DVDs and Grow a Sustainable Diet are educational tools and used in the sustainable agriculture program at Reynolds Community College in Goochland, VA where I used to teach. When I produced them, I had in mind those who couldn’t take my classes in person. So, if you have been wanting to learn more about cover crops, garden planning, garden plan dvd coverplannicover-crop-dvd-blogng your diet around your garden, and planning your permaculture homestead, take advantage of this opportunity to purchase an educational  program that will walk you through the process and help you apply your new found information to your own situation. Or, you may have someone on your holiday gift list that would benefit from these materials. You’ll find these sale prices on my website at www.HomeplaceEarth.com, along with deals for a few great books that I didn’t write.

flax-flowers-blog

flax flowers in the garden

I did enjoy my time off from writing. No matter what you are involved in, it is always good to step back now and then. My wrist has healed nicely, although I am still a bit careful with it. My husband and I took a long-awaited trip to Ireland in May and it was nice not working blog posts around that. In spite of working slower due to my injury, I grew several new crops this year. Flax for linen has been harvested and retted and is

yarn-and-indigo-plants-2-blog

wool yarn nestled among the Japanese indigo plants it was dyed with

waiting for me to build some fiber tools to process it (next on my to-do list). I trialed two kinds of rice this year. I also grew Japanese indigo and used it for some dye work, part of my new focus on fiber and textiles. Once I was sufficiently recovered, I was back to spinning my homegrown naturally-colored cotton for a shirt that I intended to make, weaving the fabric on my small table loom. It’s finished and I wore it for the first time on Thanksgiving.

Working with homegrown fiber is important to me in so many ways. Of course, there was the challenge to see if I could grow, spin, weave, design, and sew garments for myself to wear, and now I have a vest and

OLYMPUS DIGITAL CAMERAa shirt. Hurray! I’ve used my time away from this blog to read and learn more about the history of textiles. What was once local production fueled the industrial revolution and the exploiting of people and resources has continued ever since to bring us cheap clothes—way too many cheap clothes. When you shop for clothes I would like you to consider how the people who produced them and the earth that provided the raw materials were compensated to bring you such bargains. There is much to talk about on this subject, so stay tuned. I will be telling you all about my new homegrown, handspun, handwoven, naturally-colored cotton shirt in a future post. I will also be sharing my adventures with the flax, rice, Japanese indigo and other natural dyeing, while I continue addressing the many topics you have enjoyed in this blog.

Learning about my new shirt, however, will have to wait until I fill you in about what has been happening in the seed library world. Seed libraries have been deemed exempt from state seed laws, by the way. You can learn more about that in my next post, which should appear next week. After that I will go back to my old schedule of posting every two weeks.

The video Seed: The Untold Story has been making the rounds and will be shown in Charlottesville, VA on December 8. You need to reserve your ticket ahead of time and you can do that here. After the film there will be a question and answer period with a panel staffed by folks from Southern Exposure Seed Exchange and ME. If you go, be sure and catch me afterwards. I’m always happy to meet the people who read my words.homeplace earth

Read Full Post »

garden clipboard and veggies

I hope you have been making notes from your garden and your kitchen about what you have been growing and eating this summer. Being able to eat as much of a meal as you can from what you have produced is a feeling of accomplishment. Even if you don’t grow everything you eat, supplementing your meals with items from local growers can give you the same good feeling. It is very satisfying to sit down to a meal and know where everything came from and how it was grown.

If you are striving to produce meals with only (or mostly) homegrown ingredients, what would you have to provide, in addition to what you already grow, to make that happen? For example, you could make sure the ingredients for salsa or spaghetti sauce are in your garden plan. In my Homegrown Friday posts you can read how I only consumed what I’d grown for the Fridays in Lent. If you run out of ingredients in your favorite dishes long before next year’s crop comes in, plan now to plant more if space allows.

I know that garden space is at a premium for many and that careful choices need to be made. In that case, think of local growers as an extension of your garden. Whatever they can supply in abundance is something you can take off the list for your garden if you have limited room. You could devote your garden space to the things you love that there is never enough of at the local markets, whether it is sugar snap peas, potatoes, or a special winter squash. Maybe you want to eat from your garden all winter. Those crops need to be planned for, since they will be planted while the traditional summer crops are still in the ground. You will find a three-bed plan for winter eating in my post Winter Food Crop Rotation.

cover crops in late winter

Cover crops in late winter.

Now is the time to be planning for next year because as the summer crops fade away and space opens up, cover crops need to be planted. Which cover crop to plant in each bed is determined by what crop will follow next year. If you are managing cover crops with hand tools, as I advocate, the cover crops have to be finished before the next crop goes in. By finished I mean winterkilled, cut at the proper time to lie down as mulch or compost material, or harvested at the end of its life cycle. A handout that will help you with cover crop decisions is available as a free download on the resource page on my website. In Grow a Sustainable Diet there are sample garden maps showing how to include cover crops in your rotations, the reasoning behind the cover crop choices, and thoughts on what other choices could be made. Getting cover crops planted this fall is your first step to having a great garden in 2016, as long as they are planned with the next crop in mind.

Mississippi Silver cowpeas ready to harvest for dry beans.

Mississippi Silver cowpeas ready to harvest for dry beans.

Just so you know, the perfect garden plan doesn’t exist. You will always be changing it as new ideas come your way. Also, the weather has a way of encouraging gardeners like us to look at new varieties and new crops to add to our plans. Cowpeas came to be part of my garden after a couple years of serious drought. I put my mind to what grows well in dry times here in the mid-Atlantic region and came up with cowpeas, sometimes known as Southern peas. That first year with the cowpeas was another dry one and they did great. Don’t you know, the following year was the wettest year I have ever experienced. The cowpeas did great then, also, and have been part of my garden ever since. I save seed each year, ensuring I will have adequate seed for next year that is already acclimated to my garden, no matter what the weather brings.

If eating a substantial part of your diet from your garden and local sources is a goal for you, participating in the 10-Day Local Food Challenge can be a gauge to measure how far you have come. The formal challenge is taking place October 1-10, but you could determine any days to be your challenge. The formal challenge suggests you eat food grown within 100 miles for 10 days. Acknowledging that humans have been trading for eons, 10 exotics are allowed to augment your local/homegrown diet. The exotics are things not grown within the 100 mile limit. So, if you really can’t exist without coffee and chocolate you can include them in your exotics while you think about weaning yourself off of them a bit. Maybe you could experiment with herb teas from your garden rather than having another cup of coffee. I don’t have any suggestions for the chocolate other than to experience all the flavors you can from your garden, which will fill your belly and your soul, lessening the need for something like chocolate.homeplace earth

Read Full Post »

Garden in late winter with compost piles as part of the rotation.

Garden in late winter with compost piles as part of the rotation.

For many years I had compost bins lined up on the edge of my garden. Discussion about compost generally included what kind of bins I used and where I sourced the materials to put in them. My bins were made from pallets I acquired for free. Each of three sides was made by pounding two t-posts into the ground and sliding a pallet over them. If one side needed to be replaced, that could be easily done, since the sides weren’t tied or nailed together. The fourth side was made by using bungee cords to hold it in place. To remove the compost, I released that side by removing the bungee cords.

The ingredients of those piles were usually animal bedding (from our animals or some I brought in from other places), leaves (from here or elsewhere), food scraps from our table, and maybe grass clippings. The compost bin was a handy place to toss garden residue—weeds and spent plants. Gradually I stopped including outside materials in my compost as I studied GROW BIONTENSIVE (GB) methods and produced more of my own compost biomass in my garden. The bulk of the material I used to bring in was for the carbon. With GB I grew more grains and corn, using the straw and stalks for carbon. Eventually, all the compost materials were coming from my own garden.

Butternut squash growing around and over the compost pile.

Butternut squash growing around and over the compost pile.

Rethinking the materials is only part of rethinking compost piles. If you are into tidy, and think compost requires a bin, you may have a hard time thinking outside that, but I urge you to try. Besides keeping them tidy, bins serve to keep animals out of your piles. If you include food scraps in your piles and have a dog, or neighborhood dogs frequent your place, you may want a bin. However, if your compost pile is within your fenced garden, you have already fenced out the critters. Once I put a fence around the garden I did away with the bins, but the piles were still on the edge of the garden space. It was when butternut squash grew wild around and over my pile one year that I began to think about the nutrients that were leaching into the ground each year beneath the piles and not being used.

Having to walk back and forth to the edge of the garden to put compost materials there that had grown in the garden, or to retrieve compost for the beds, also served to nudge me into planning to have my compost piles as part of my garden rotation. By the way, I did away with the notion that compost needed to be turned regularly long ago. Left to what they do best and the microbes turn all that organic matter into finished compost all by themselves. I do water occasionally to keep them hydrated.

Now I devote a garden bed, actually more than one, to compost. On my garden map, compost is shown, just as all the crops for the year are. The two biggest times for starting a new pile for me are in June when the grains are harvested and in October when the cornstalks, sweet potato, and peanuts are harvested. It is in October when the new compost bed is put to use. Whatever bed is designated to store compost for the coming year is where I start the new pile in October. The pile I created in the summer that needs more time to cure will be moved to this new compost bed. That is the only time it gets turned. If the new compost bed is part of the garden rotation it will be located next to the old compost bed, making the transition an easy one. You do not want to do any long distance hauling—just fork it from one bed to the next.

numbered compost piles

numbered compost piles

The rest of the compost in that bed, including the one started the previous October, should be ready to spread, which I do in September and October before I plant cover crops. Throughout the year there will be other materials added to the piles as weeding and harvesting is done. There will also be finished compost available to add to beds each time a new crop goes in. By following GB guidelines and having at least 60% of the garden devoted to compost crops for the year, it is easy to have an abundance of compost. To keep track of the order the piles were made, so I know which will be ready to use next and which needs to set longer, I use old smooth metal fence posts (the kind used for electric fence) with blocks of wood on top with a number painted on them. Some people have little signs for their piles that say such things as “use me”, “feed me”, or “working.” The pile that I make in the fall will not be ready to use until the next fall. Wanting to make the best use of all my resources, including space and available nutrients, I plant butternut squash around the base of that pile and let the plants grow over it. Besides soaking up nutrients from beneath, the plants shade the pile, preventing weeds from moving in. By the time the winter squash is harvested, the compost is ready to spread.

In October I plant winter rye in the bed that the compost vacated. That cover crop soaks up all the nutrients that may have leached from the piles and gives them to the corn that will go into that bed the following year. When the rye is shedding pollen (about May 7 here in Zone 7), I cut it with a sickle and leave it lie in the bed as mulch. Two weeks later I transplant corn into the mulch. Generally there is a small amount of a legume, such as Austrian winter peas, sown and harvested with the rye. I have my best crop of corn in the bed that follows the compost.

This might all seem confusing, but if you take time to think it through, it will become clear. In Grow a Sustainable Diet I explain GROW BIOINTENSIVE methods and how to plan to have 60% of your garden in cover crops for the year. In that book I also have a garden map and explanation for the Garden of Ideas that shows compost as part of the garden rotation. My DVD Cover Crops and Compost Crops IN Your Garden shows compost making in the beds and the management of the cover crops with hand tools through the growing season. Think outside the compost bin and make compost an integral part of your garden!Homeplace Earth

Read Full Post »

John Jeavons giving a free lecture at Eastern Mennonite University in Harrisonburg, Virginia, the evening before a 3 -Day Workshop in 2008.

John Jeavons giving a free lecture at Eastern Mennonite University in Harrisonburg, Virginia, the evening before a 3 -Day Workshop in 2008.

Ecology Action began more than forty years ago when John Jeavons was seeking the answer to his question of how much space it would take to grow food for one person for a year. The focus on this work expanded to include also growing the crops to feed the soil. Besides researching growing a complete diet and the cover/compost crops needed for the soil, all in as small a space as possible, Ecology Action seeks to educate people worldwide to better feed themselves while building and preserving the soil and conserving resources.

Ecology Action maintains a website at www.GrowBiointensive.org where you will find information about their work, intern/apprentice opportunities, and a list of publications, some of which are in languages other than English. The outlet for Ecology Action’s research is Bountiful Gardens. There, in addition to seeds, you will find the Ecology Action GROW BIOINTENSIVE® publications. You can also purchase the DVD Grow Biointensive: A Beginner’s Guide in 8 Easy Sessions through Bountiful Gardens or watch each session for free at www.johnjeavons.info/video.

In January 2014 Ecology Action held a 2-Week Farmers Course at their place in Willlits, California. This important event contained lectures from twelve different sustainability experts from around the world plus hands-on learning experiences. Through the wonders of the Internet, you now have access to some of the lectures in that course. Having produced two DVDs myself, I have an appreciation of what an undertaking it was to have the Farmers Course filmed, edited, and made available to you at www.vimeo.com/ondemand/ecologyaction. There are four free lectures and another seven lectures available for $1.99 each or $11.99 for all seven.

Ecology Action holds 3-Day Workshops which consist of lectures with a half-day of hands-on activities in the garden. Watching these Farmers Course lectures will give you a taste of what a 3-Day Workshop is like if you’ve never been to one. If you have, these lectures will support what you’ve already learned and supply you with new insights and knowledge. One advantage of being able to watch them on your computer is that you can stop if you need to take a break or if you want more time to take notes.

HTGMV 8--BLOGOne of the four free episodes is a 40 minute introduction to the course which is different than the paid Introduction. The free episode shows a number of speakers from throughout the course besides John Jeavons; including Steve Moore, Jake Blehm, Eric Buteyn, Jed Diamond, Patricia Mayagoitia, Juan Manuel Martinez Valdez, Samuel Nderitu, and Peris Wanjiru. The $1.99 Introduction contains John’s full lecture on the world situation (parts of it are in the free introduction). Although the world situation looks dire, John stresses that we are each the solution to a dying world, which is actually a theme throughout the course.

Ecology Action Self-Teaching Mini-Series Booklets  #34, #32, and #36.

Ecology Action Self-Teaching Mini-Series Booklets #34, #31, and #36.

If you want to get the full benefit of these videos it is good to already be familiar with John’s book How to Grow More Vegetables (HTGMV). If you want to better understand his Diet Design lecture, it would be good to have first read Ecology Action’s Self-Teaching Mini-Series Booklet #31 Designing a GROW BIONTENSIVE Sustainable Mini-Farm. In the Diet lecture, he refers to worksheets that are found in Booklet #31. Booklets #34 Food for the Future Now and #36 An Experimental 33-Bed GROW BIOINTENSIVE Mini-Farm are also good resources. When attending an Ecology Action 3-Day Workshop it is recommended that you have read the Ecology Action publications ahead of time.

Ecology Action Self-Teaching Mini-Series Booklet #32

Ecology Action Self-Teaching Mini-Series Booklet #32

I consider Ecology Action Booklet #32 GROW BIOINTENSIVE Composting and Growing Compost Materials a companion to John’s Compost lecture. In that talk he speaks of the importance of building organic matter in the soil using compost, specifically compost made from materials grown biointensively in your garden. Compost holds 6 times its weight in water, which is an important consideration in times of water scarcity. You can store water in your soil by using compost to increase the organic matter in your garden. John explains why compost piles that are cool, rather than hot, contain more microbes than the hot piles and puts to rest any thought of needing to turn your compost piles regularly. It is better to let them molder in place, particularly if that place is in rotation in your garden. You can find more information about having a compost pile in your garden rotation in my DVDs and my book Grow a Sustainable Diet. The short and long range benefits of having a carbon to nitrogen ratio greater than 30:1 are also part of this lecture.

The lectures in this series include Operational Seed Security Systems by Sameul Nderitu from Kenya. He explains how his organization, G-BIACK, is encouraging farmers to save their own seeds. Just as in the U.S., farmers in Kenya tend to buy all their seeds each year from seed companies. In Kenya it is illegal for a farmer to sell seeds unless he has fulfilled all the requirements of a seed company, which is prohibitive. So, instead of selling their seeds as seeds, they sell them as food, which is legal.

Samuel’s wife, Peris Wanjiru spoke of Women Empowerment Programmes through G-BIACK . The women in Kenya are predominately illiterate and responsible for all of the household. If G-BIACK can teach the women biointensive gardening, solar cooking, and baking (to mention only a few of the subjects), they can help the whole family much more than targeting the men for education. G-BIACK stands for Grow Biontensive Agriculture Centre of Kenya. Samuel and Peris are graduates of the Manor House in Kenya, which expects its graduates to go back to their communities and make a difference. G-BIACK is the non-profit that they started and it has made a difference in the lives of so many people in Kenya. In turn, those people go back to their communities and teach others.

Steve Moore’s lecture on Farm Layout and Agroecology brings permaculture to the program and explains how a Biointensive garden needs to blend into the natural world and not be separate from it. Biointensive is actually the intensive gardening part of permaculture. Part of GROW BIOINTENSIVE teaching is that at least half of the area managed should be left to the wild. We need the wild areas of the natural world to filter our air and water, store water, and remove toxins.

There is more, but you will just have to watch these videos and check it out for yourself. I hope you take advantage of this opportunity to learn more about GROW BIOINTENSIVE, John Jeavons, Ecology Action, and the whole crew of folks you will be seeing on the screen.

Homeplace Earth


Read Full Post »

Winter Food Crop Rotation-- croppedIn January 2013 I wrote about what I do to have winter carrots. I begin in the fall of the previous year and plant rye in rows in my future carrot bed. The rye crop is allowed to mature all the way to seed, which around here in zone 7 is mid-June. When it is cut, the harvest is seed and straw. I lightly hoe between the rows of stubble and plant carrots. I keep this bed well watered to get the carrots off to a good start and replant if there are spots lacking good germination. Once everything is growing well the only attention is to weed periodically. The stubble decomposes, gently feeding back the soil for the carrots.

With this post I thought I would show the carrots in a three bed rotation plan that provides greens and carrots for my household through the fall and winter months, while feeding back the soil with cover crops. If you have trouble reading the text on the garden map, click on it and it will open up in a new window, as will all my photos. I grow all of my compost and mulch materials in order to avoid bringing damaging materials into my garden. In the photo you can see the skeleton of this plan. The carrots and kale and collards take up 43% of the space for the year in the total of the three beds. There are 12 bed crop months in each bed for a total of 36 bed crop months. The carrots and greens use 15.5 bed crop months, or 43%. When I plan cover crops I like to have 60% of the bed crop months in the garden in soil building crops. That would mean that the rest of the space in the three beds would need to be devoted to cover crops, plus I need to have some extra in the rest of the garden to make up for the shortage here. The winter rye that is already part of the rotation is a cover crop.

Rye planted in rows in preparation for carrots to be planted into the stubble the following June.

Rye planted in rows in preparation for carrots to be planted into the stubble the following June.

The map you see is for the calendar year, showing the crops that are already in each bed at the beginning of the year. The green areas in the plan show when each bed is available for crops beyond the carrots and greens winter food plan. There is a lot of flexibility here. First I will give suggestions for filling those areas with cover crops. Bed 1 is already filled all twelve months, so look at Bed 2. You will harvest carrots from the fall until you have pulled them all or the weather warms in March and they start sending up a seed stalk. If you still have some then, pull them and store them in plastic bags in the fridge and you can have carrots for weeks in your kitchen. If you want to save seed, leave some of the carrots in the garden to go to seed. That might take until July so you may want to have those on one side of the bed, leaving the rest of the bed for something else. Only save from one variety to avoid crossing. My plan shows the carrots are there until March 1. That could vary and they could be there until they show signs of bolting. For a soil building crop you could plant fava beans or field peas. Favas and field pea plants can be harvested as green biomass for the compost pile when they reach full flower. In my area the blooms of fava beans tend to fall off when the weather gets hot, making it hard to save seed anyway. If you take them while blooming, you could follow with another legume, such as cowpeas or soybeans for biomass. Buckwheat can be planted anytime in there to keep the bed planted and to attract beneficial insects. The goal is to have the bed free by the middle of August for the kale and collard transplants that will overwinter. It helps to put a low tunnel on this bed then. It provides a frame for shade cloth at transplanting that is replaced by a plastic cover when the weather warrants. This low tunnel can be moved from one bed to the other to follow the brassicas crop.

Greens and roots for winter food.

Greens and roots for winter food.

In Bed 3 you can see that it begins the calendar year with kale and collards already there, left from last year’s planting. That group of crops (carrots early and kale/collards late) were planted in Bed 3 the previous year as you can see by the rotation arrows, leaving the kale/collards there to overwinter. If the harvest is for greens only, the bed will be ready for the next crop in mid-March. If you intend to save seeds from either kale or collards, those plants will be in the bed until June. Favas or field peas are an option for this bed, but so is spring wheat. That could be followed by cowpeas (or another legume), then buckwheat before it is time to plant the winter rye. In my area rye can go in anytime in October. Plant the rye in rows as to make the carrot planting easier. You can see by the rotation arrows that the crops in Bed 1 will rotate to Bed 3 in the next year and conveniently, the rye will be there, right on schedule.

If you have plenty of compost materials from the other beds in your garden you might prefer to plant crops for eating in those green spaces on the map. In that case, salad crops such as sugar snap peas, lettuce, spinach, and bunching onions could be planted after the carrots or kale and collards. Those crops could be followed by snap beans. Bed 2 needs to be open by mid-August, but you have into the fall in Bed 3 leaving the possibility of planting sweet potatoes in late May/early June after the salad crops. Winter squash is a possibility in Bed 3 and you can use the rye straw harvested from Bed 1 as mulch. Potatoes followed by snap beans could happen in either bed.

Of course, the timing of these crops depends on your location. If you enjoy going to the farmers market for fresh vegetables or belong to a summer CSA, but also like to garden, you may want to consider this winter food plan. It might do well for those of you who like to travel in the summer, as long as you are around for the key planting times. You will find other garden maps and plans in my book Grow a Sustainable Diet. Once you learn how to plan for the whole year, the possibilities are endless.

I will be talking about all of this on Saturday, January 31, 2015 in the presentation that Ira Wallace, of Southern Exposure Seed Exchange, and I are giving at the Virginia Biological Farming Conference in Richmond, VA. Come and see us!Homeplace Earth


Read Full Post »

Cornstalks and Machete

Use a machete to cut corn stalks into manageable lengths for the compost pile.

As you harvest the last of your summer crops, realize that the steps you take now are the beginning of next year’s garden. You could just leave everything as it is, looking not so good through the winter. Mother Nature likes to keep things green, so will provide her own seeds to fill in the space if you don’t. That’s where the unwanted weeds come from. The spent plants from your summer crops are actually valuable compost material at the ready. Harvest them for your compost pile as you clean up your garden. Next year this time the compost you make now will be available to spread as fertilizer for your garden. If you have grown corn and sunflowers, those stalks are wonderful sources of carbon for your compost. Some folks till all their spent plants, including cornstalks, into the soil. However, since I advocate managing your garden with hand tools, I chop the stalks down and cut them into manageable lengths with a machete, as shown in the photo. The cornstalks then go into the compost pile with all the other harvestable plants, plus some soil. You can see me in action chopping cornstalks and adding them to the compost in my DVD Cover Crops and Compost Crops IN Your Garden. When you look at the plants in your garden, make sure to recognize their value as a compost material.

Winte killed oats in late February.

Winterkilled oats in late February.

After you clean up the garden beds by harvesting compost material, you will need to plant cover crop seeds. If you have beds producing food through the winter, that’s great. It’s the rest of the garden I’m talking about. The crops you plant now will determine how each bed is to be used next year. If you intend to have bed space devoted to early season plantings, such as peas, lettuce, greens, and onions, you want the cover crops to be finished by then. Cereal rye, often called winter rye, is a great cover crop for winter. However, it is not so great if you are managing it with hand tools and you want to plant those early spring crops. The rye will have put down a tremendous amount of roots and be growing vigorously in early spring. Options to plant now in those beds destined for early spring crops are oats or Daikon radish, two crops that will winterkill if you get severe enough winter weather. Here in Virginia in Zone 7 we usually have weather that will cause these crops to winterkill, however I remember a few mild winters when they didn’t. I also remember a winter I planted oats in a bed that had compost piles on the bed just to the north of it. The compost provided enough protection to keep the oats growing into the spring.

If you choose the route of planting crops to winterkill, you need to get them planted early enough so that they have a chance to produce a large volume of biomass before the weather turns cold. If you don’t already have these crops in the ground, the time to plant them is NOW. Actually, anytime in the past three weeks would have been better. Another alternative for that space for early spring crops is to mulch it with leaves for the winter. The leaves will protect the soil over the winter and when you pull them back in early spring you will find a fine layer of compost where the leaves meet the soil. The worms would have been working on those leaves all winter. Pull the leaves back a couple weeks before you intend to plant to allow the sun to warm the soil.

Rye and vetch cut at pollen shed.

This rye and vetch cover crop was cut at pollen shed (May 7) and will dry to become a mulch for the next crop.

You want a thick cover of plant growth with any cover crop. Planting at the right time will encourage that. The legumes, such as hairy vetch, crimson clover, and Austrian winter peas are often used as fall cover crops. It is best to get them in about a month before your last frost to ensure a good stand. That should encourage you to begin cleaning up the parts of your garden that have finished producing. Not all your garden beds will be host to the same cover crop, so you can do it bed by bed—an advantage over working on the whole garden at the same time. These legumes will begin to grow and will provide protection for the soil through the winter. In early spring they will take off, growing to their full capacity by the time of your last spring frost. You may have seen crimson clover flowering in garden beds at that time. You can cut this biomass with a sickle and add it to the compost pile. It would be a nitrogen component. You could lay it down as mulch right in the bed, but it would soon dissolve into the soil and not last as long as mulch that has more carbon. The advantage of the legumes is the nitrogen they leave in the soil from the nodules on their roots. If you should need the bed sooner than the date of your last frost, you could easily cut the legume a little early, leaving the roots. They are not so tenacious that you can’t plant into the bed soon after cutting.

The winter cover crop that will produce the most carbon for your compost and/or mulch is the rye that I mentioned earlier. It is also the crop that you can plant the latest into the fall and still have a good stand; making it a possible choice after things like tomatoes and peppers that produce until the first fall frost. You can let it grow to seed and cut it in early summer (mid-June here), giving you seed and mature straw. Or, you can cut it at pollen shed (about May 7 here) and leave it in the bed as mulch. Wait two weeks before planting to let the roots begin to die back. The bed would be suitable for putting in transplants, but not for seeds at that time. Often rye is planted with a legume. If you are planting late in the season, choose Austrian winter peas as a companion.

The information in my DVD Develop a Sustainable Vegetable Garden Plan and my book, Grow a Sustainable Diet, helps you to determine how to plan these cover/compost crops into your crop rotation. In the DVD you see me explaining a four bed rotation as I fill in the crop selections on a whiteboard. The book has three sample garden maps accompanied by explanations. The sample garden maps in the DVD and in the book have crops filling the beds for all twelve months of the year. Knowing how to fit enough cover crops in your garden plan to provide all of your compost and mulch material is definitely a skill that takes concentration and practice to learn. I hope the educational materials that I have produced will help many gardeners along that path. The most important thing is to just get started and plant something. Make note of your planting time and watch how it grows. The learning is in the doing.Homeplace Earth


Read Full Post »

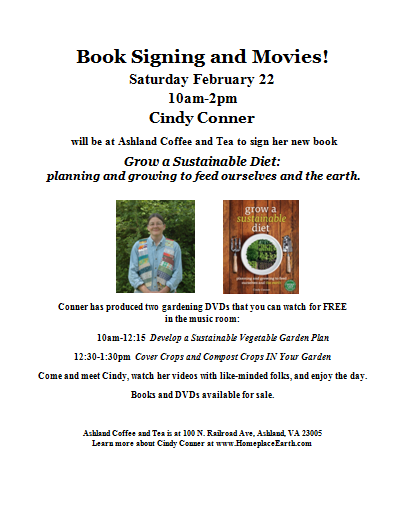
Come out and see me at my book signing on Saturday, February 22 at Ashland Coffee and Tea, Ashland, VA 23005. It is a good treatment for the spring fever you will have by the weekend with the warming trend coming. Find more upcoming events at http://homeplaceearth.com/5.html.

Book Signing and Movies-flyer-FACEBOOK

Read Full Post »

GrowSustDiet~Cat100%25My new book Grow a Sustainable Diet: planning and growing to feed  ourselves and the earth is now available through my website at HomeplaceEarth.com. The home page contains two recently added preview videos about our DVDs. The purchase page contains more information about the book, plus the “add to cart” button to buy it.

You’ll find more information about what this book is about at my August 13, 2013 post  Grow a Sustainable Diet–the Book! 

Read Full Post »

Older Posts »