Feeds:
Posts
Comments

Archive for the ‘phenology’ Category

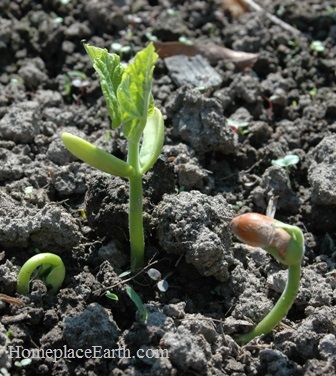
bean-seedlings-blogIf you are new to vegetable gardening, or even if you are an experienced gardener who has moved to a new climate, it may be hard to decide when to plant. It is easy to make a list of what you want in your garden, but when to put the seeds or transplants in the ground is the conundrum. There are many things to consider, but the most important is to know the average first and last frost dates for the area you are considering. If you have been keeping temperature records, that’s great! However, not many are that diligent. Not to worry, others have that information available for you. I am sure you could find it through the weather service or your local Cooperative Extension Service, but I’ve found that a quick way to get temperature and precipitation information is through plantmaps.com. The amount of annual rainfall is important, also.

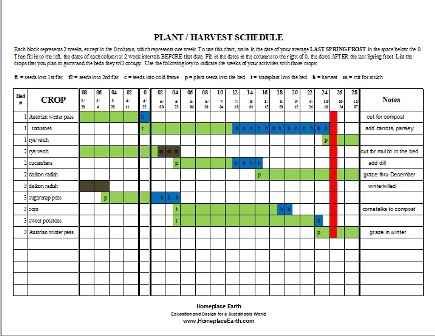
Seed catalogs are a great help when deciding plant dates. At the beginning of each crop section in the catalog there is generally an information box that will guide you on planting. It might indicate that you should wait until after the last spring frost to plant a particular crop, but start the seeds about six weeks before you expect to put the transplants in the ground. So, count back six weeks from the date you have chosen to indicate your last expected frost and you know when to start the seeds in your house or in your coldframe. At the resource page of my website you can download a free Plant / Harvest Schedule to help you with your planning. You fill in your own crops and dates. p-h-sample-garden-w-cover-crops-blog
More confusing is when the planting information directs you to plant as soon as the soil can be worked. In that case I would look to what the soil temperature should be and the seed catalogs will indicate that.  FYI, the soil temperature is generally about 60° around the date of your last expected frost in the spring. Find more information at my post How Important is Soil Temperature. You can use a compost thermometer or a household kitchen thermometer to take the temperature of your soil several inches deep.
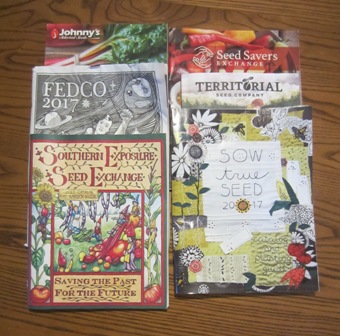
2017-catalogs-blogThe catalogs I have are Southern Exposure Seed Exchange (Virginia and local to me), Sow True Seed (North Carolina), Fedco (Maine), Johnny’s (Maine), High Mowing (Vermont), Seed Savers Exchange (Iowa), Territorial (Oregon), and Bountiful Gardens (California). I like to source my seeds as close to home as possible, but sometimes there are items or varieties that are available further away that I seek out.

It is good to have an overall reference book in your home library that you can consult for growing information for specific crops. In my early gardening days I was given a copy of How to Grow Vegetables and Fruits by the Organic Method edited by J.I. Rodale and the staff at Rodale Books. I still look to that when I have questions about a crop. In fact, I wore the binding out on my first copy and now use a copy I found in good condition at a used book store. A more recent book that is a terrific reference and one I turn to, also, is Pam Dawling’s Sustainable Market Farming. Pam is growing in the mid-Atlantic region but much of her information is applicable to a wider geographical area. You can find books specific to your region. Ira Wallace, of Southern Exposure Seed Exchange, authored The Timber Press Guide to Vegetable Gardening in the Southeast. Timber Press has published growing guides for seven regions of the U.S.

Here in Virginia, some crops, such as kale, can be planted in both the early spring and in the fall. It is too hot for these crops in mid-summer. My main crop of kale is planted in late summer for a fall and winter harvest. About March, as the days begin to warm up, overwintered kale will bolt, meaning it will send up a seed stalk that will flower and, if left alone, will produce seeds. Generally you would clear out those plants to make room for spring and summer crops, unless you plan on saving seeds. Seeds for my spring crop of kale will go into the coldframe sometime in late February, to be planted out in the garden when the seedlings are big enough—late March or early April.

A friend recently asked about growing in North Dakota, specifically at the Standing Rock Indian Reservation. She will be visiting there in late July and wanted gardening information. According to plantmaps.com, the last spring frost there is the first week of May and the first fall frost is late September.  I consulted The Old Farmer’s Almanac gardening calendar at http://www.almanac.com/gardening/planting-dates/states and found that when she gets there it will be time to plant lettuce, radish, spinach, and Swiss chard for a fall harvest.

In Zone 7 we can harvest lettuce until about Christmas and kale and collards all winter under a single layer row cover. The temperature rarely dips into the single digits, and then not for long. According to plantmaps.com, at Standing Rock in Zone 4b the temperature could go as low as minus 25°. Only the most cold hardy of greens could survive, and then with multiple layers of cover. It is important to research what varieties would do best under those conditions. For extended fall planting and harvesting times under rowcovers, consult Table 16 pages 205-207, in Eliot Coleman’s Four Season Harvest, 2nd edition. It helps you determine your planting times according to your first expected fall frost and, also, if you have one or more covers over your crops.

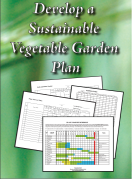
The summer nights are cooler in Standing Rock than they are here in Virginia. Besides warm nights, we have high humidity here. Our rainfall, about 44” annually, occurs fairly evenly throughout the year. Standing Rock gets only about 14.5” per year, mostly from April through October. Other places might get the bulk of their rainfall in the winter. More plays into your success in your garden than just knowing the frost dates, but that is a good place to begin to know your climate and when to plant. If you want to start keeping temperature and precipitation records for your garden, I have worksheets for that on the CD that comes with my DVD, Develop a Sustainable Vegetable Garden Plan. There is also a download code for these record sheets in my book, Grow a Sustainable Diet. Getting better acquainted with your garden this way will help you understand what Mother Nature is saying to you when you are there. Listen carefully.
homeplace earth


FEBRUARY 3, 1017 UPDATE: I was alerted that the map that appears on plantmaps.com is the USDA Hardiness map for 1990. The USDA updated their maps in 2012. Scroll to the bottom of that map and you will find a link to the 2012 map. There is also a link to the updated map in the right sidebar. Plantmaps.com has maps for countries other than the U.S., which should be helpful to many of my readers around the world.


Read Full Post »

20" long compost thermometer with a 1 3/4" face

20″ long compost thermometer with a 1 3/4″ face

Spring is here and I know you are anxious to be in the garden. As soon as the temperatures begin to climb it is really tempting to get seeds in the ground. Before you take that step, however, I encourage you to make sure the ground is ready for your seeds. Of course, you will loosen the soil and add compost and, if necessary, organic fertilizers, but did you take the temperature of the soil?

Seeds are naturally programmed to germinate and grow within a certain range of temperatures. Within that range they will grow faster or slower, depending on their comfort zone. It has been my experience that just because it is the right time to plant on the calendar, it may not be the right time to plant according to the soil. The temperature of the soil is more important than the date on the calendar. When I was a market gardener I would be anxious to get sugar snap peas in the ground in early March. I would put in another planting two weeks later. If the weather had been too cool, the first planting may not come into production until the second planting did. I learned to pull back the leaf mulch that covered the bed over the winter and put down a sheet of plastic two weeks before planting the sugar snaps to warm the soil. If the weather has been too cool and wet there is the danger that the seeds will rot and not germinate at all. Peas, beans, and corn are most susceptible to this, which is why you might find those seeds for sale coated with fungicide. Steer clear of fungicide coated seeds and plant at the right time. Beans and corn like the soil to be 60° F (15.6 °C) and cowpeas would like it if you wait to plant until it warms to 65° F (18.3°C).

If you have mulch covering some of your garden beds, go out and stick your hand in the soil under the mulch and then put your hand in the soil in a bed without mulch. You will feel a noticeable difference in the temperature. During the winter an organic mulch such as leaves or straw does a good job of protecting the soil and providing habitat for the earthworms. However, when things begin to warm up in the spring the mulch will insulate the soil from the sun’s rays. Removing the mulch two weeks ahead of planting will help to warm the soil. I am not so much in a hurry these days, so I don’t use plastic to further warm the soil, but it is an option. With my system of cover cropping, when the cover crop is finished, it is naturally time to plant the next crop.

thermometer with a 5" stem and 1 1/4" face

thermometer with a 5″ stem and 1 1/4″ face

You can monitor the temperature of the soil with a thermometer or by sticking your hand in the ground. Even better, go barefoot. There’s nothing like the whole body experience. You might want to use a thermometer until you can gauge the temperature by touch. I use either a 20” long compost thermometer with a 1¾” face (top photo) or a thermometer with a 5” stem and 1¼” face that I bought at the grocery store. I keep the long thermometer stuck in the soil somewhere so I don’t lose it. Usually it is in my coldframe, where it is right now. The nice thing about the compost thermometer is that it is easy to read without bending over too much. The small thermometer has so many uses. It comes with a plastic sleeve that has a pocket clip –handy if you are going to be carrying it around. The one you see in the photo is the one I use to monitor the temperature in my solar food dryer. It sticks through a hole drilled for that purpose with just the gauge showing on the outside of the dryer. A small thermometer such as this can be used in the kitchen, which is why you will find it in the grocery store.

You can find a chart showing a list of crops and the minimum, optimum, optimum range, and maximum soil temperature conditions for each in How to Grow More Vegetables by John Jeavons. A chart I find interesting is Days to Appearance of Seedlings at Various Soil Temperatures from Seed Planted at ½” Depth, compiled by J.F. Harrington. You can find it with an Internet search. It shows the number of days it takes for each crop to germinate at different temperatures. For example, peas will take 36 days to germinate at a soil temperature of 41°F (5°C), 13 days at 50°F (10°C) and 9 days at 59°F (15°C). You can see how warming up the soil will contribute to an earlier crop.

tomato,pepper, and zinnia seedlings in the coldframe???????????????????????????????

coldframe seedlings–tomatoes, peppers, and zinnias

Peppers, on the other hand, are shown to take 25 days to germinate at 59°F, 12 days at 68°F (20°C) and 9 days at 77° F (25° C). If you plant pepper and tomato seeds at the same time, the tomatoes will germinate first—in 14 days at 59°F, 8 days at 68°, and 6 days at 77°. I start my seeds in my coldframes, which provide cooler temperatures than starting them in the house. I put tomato, pepper, and other seeds of warm weather crops in my coldframe during the last week of March. Since I save much of my own seeds, I am developing strains of each crop that will germinate in cooler soil. The healthy plants that I take out of the coldframe are the ones that have germinated and thrived in the cooler conditions. The peppers that I have been most successful with in the coldframe are Corno di Toro and Ruffled Hungarian.

By saving your own seeds, you can develop strains of your crops that will germinate and grow under the conditions that you want to work with. Experiment with planting times and conditions in your garden. I would advise, however, to only take chances with what you can afford to lose. If you go into it with that attitude, you won’t be disappointed.

Homeplace Earth


Read Full Post »

melting snow 2-18-14A recent snowfall gave me an opportunity to take some new photos. Things can come and go right before our eyes, and if we don’t take the time to look carefully we’ll never see them. I like to take photos of the snow melting to remind me of the variations in soil temperature and the micro-climates we have everywhere. I mentioned soil temperature in my post on Phenology. This garden photo was taken on February 18. The weather was warming and the first place the snow began to melt was on the south side of my garden beds, which run from east to west. When I see this in late winter I’m reminded of the idea I’ve always had in the back of my head to make the soil on a garden bed slant towards the south. This could be done in the fall and the bed would be ready early in the spring, or even late winter, for planting. The soil would warm first on the whole bed. With a cold frame on top, things could get off to a really good start.

melting snow in coldframeSo far, however, my coldframes have stayed on flat ground. The covers slant, since the front (south) side is 8” tall and the back (north) side is 12” tall. On February 20 I took this photo of the coldframe which had no cover for the winter because it wasn’t planted. The snow had melted everywhere except the places with the most shade. Since the sun is so low in the sky during these winter months, it casts a longer shadow. If I would have had a cover on that coldframe, the snow would surely have melted everywhere in there. However, the front of the box would still be shading the strip of soil beside it. The sides of the box cast a shadow, also, but only for part of the day. The east side (foreground) is shaded in the morning and the west side is shaded in the afternoon. The strip to the south (with snow) stays shaded all day until spring when the sun is sufficiently high enough in the sky to peek over the edge all day.

You could solve that problem by using a clear plastic row cover. With clear plastic coming all the way to the ground you don’t have that shaded area on the inside; however, the structure itself will shade just to the north. You can see that by the row cover in the topmost part of the coldframe photo. The area to the north of the coldframe is also left with a bit of snow where it is shaded. I don’t have plans to plant anything directly to the north of these two structures, but it is interesting to note. When I plant seeds in the coldframe I plant many rows. I run these rows across the short way, north-to-south. If that bit of shade on the inside is enough to affect anything, it won’t affect all of one thing.

melting snow by board fenceOther interesting snow / shade spots are to the north of our board fence. You would think that since there is space between the boards, the sun would reach through. There is also a line of snow to the north of the hazelnut hedge in the upper left of that fence photo. There is a wire fence there and the hazelnut trees have lost their leaves, but it is still enough to leave a snow line.

You don’t have to have snow to notice the shaded areas, but it is a whole lot easier. When I took the first photos on February 18 the snow had melted in the front yard, but not in the back yard (north side of the house). On February 20 when I was out with the camera I noticed that half the snow had melted in the backyard. There was still snow in the area that showed up as a shadow on the snow in my photos two days earlier. Last summer I paid particular attention to the sun and shade there in the flower bed near the house (very last place for the snow to melt). I was looking for a space to plant a few cotton plants that I wanted to keep separate from my other cotton. I determined that the sun was high enough, and would be that way long enough, for the cotton. It was with careful consideration that I put those cotton plants there. That would have worked, too, except that the summer was extremely cloudy and even the cotton that was planted in the sunniest part of the garden didn’t mature. Oh well.

I’m sure you’ve noticed the days getting longer and spring will be here before you know it. The sun will cross the sky a little higher each day, making the shadows not quite so long. If you pay attention to the little nuances occurring in your garden you will be off to a good beginning as you start your seeds and set out transplants.Homeplace Earth

Read Full Post »

williams pride in full bloom 2013 - closeup-BLOG

Williams Pride apple blossoms

What you see in the photo is blossoms on a Williams Pride apple tree. The data stored automatically from my digital camera says that photo was taken on April 16, 2013. What a handy thing that is for the camera to record that information! I surely didn’t at the time. What difference does it make that I know when that happened? Knowing when the bushes and trees in your yard bloom, drop petals, and whatever else they do, helps you to know when the time is right for planting your vegetable crops without looking at the calendar. The study of recurring plant and animal life cycles and their relationship to weather is called phenology. By studying these things, we can learn how our climate is changing from year to year and, more specifically, we can know how things are doing this year. Are things blooming later than usual? In that case you wouldn’t want to be too anxious and plant your vegetable crops earlier than normal. My friends, Pam Dawling and Ira Wallace, keep phenology records of what is happening at their farms in Louisa County, Virginia. In her book, Sustainable Market Farming, Pam says that falling apple blossoms are said to be a phenological sign that conditions are good for transplanting celery and celeriac. She goes on to say that the time to plant is after the last frost and the weather has settled. For planning purposes, I use April 26 as the date for my last expected frost. I imagine those petals would have been dropping by then. You can read more about what Pam has to say about phenology and even see the chart she keeps for the gardens at Twin Oaks Community at http://sustainablemarketfarming.com/tag/phenology/. Ira mentions phenological signs in her book Vegetable Gardening in the Southeast. In this era of climate change, the date on the calendar of when to plant things will gradually shift, but nature will already be on top of it.

The temperature of the soil is also an indicator of when to plant. In fact, soil temperature has a lot to do with the phenological signs I just mentioned. Just because the air temperature has warmed up, doesn’t mean the soil is ready for seeds and plants. Over the years I’ve noticed that we have a warm week in the first half of April. The temperature might even soar into the 80’s. I’ve also noticed that in the next couple weeks after that, April will deliver cold temperatures before the weather settles. I taught at a community college and no matter how much I talked about expected last frost dates (and that it wasn’t until late in April in our area), some of my students would plant warm weather crops during those early warm days. A new farmer once asked me when I planted summer squash and snap beans. When I replied after April 26, he said he got that same answer from a neighbor. It was that warm spell in early April and he had just planted his warm weather crops. He thought I was being too cautious. I advised him to only plant early what he was prepared to lose and to plant his main crop when the soil was warmer.  Of course, many farmers have high tunnels and use row covers now to get a head start on planting. They are warming the soil to prepare the right conditions for the seeds and transplants.

compost thermometer in kale bed

compost thermometer in kale bed

You can check the soil temperature by putting the probe of a thermometer a few inches into the soil. I use a compost thermometer for that. It has a long stem that serves two purposes. I can read it without bending down so far and I can find it when I need it. I often leave it in a garden bed or a coldframe so I know where it is. I can readily know the temperature in that spot and pick it up to move it to a new location. I have a thermometer I keep in my kitchen that I bought from a cheesemaking supplier. I use it when I make yogurt, but it would do to check my soil. You can buy an inexpensive (about $7) thermometer at the grocery store. Those thermometers even come with a plastic sleeve to protect the stem. That would do fine to check your soil temperature. As long as you are keeping records of phenological signs, you might record the soil temperature at the same time. Keep in mind that it will vary if you are checking it at different times of the day or in different locations, so be consistent. Nancy Bubel’s book The New Seed Starters Handbook contains helpful charts on Soil Temperature Conditions for Vegetable Seed Germination, the Number of Days for Vegetable Seeds to Emerge at Different Temperatures, and the Percentage of Normal Vegetable Seedlings Produced at Different Temperatures.

ladybug on cowpea plant

ladybug on cowpea plant

Knowing what the insects and birds are doing should be part of your phenological records. If you haven’t gotten your record keeping set up before things start blooming and insects and birds start appearing, take photos and let your camera record the date for you, if your camera does that. If insects are on a plant, by taking the photo, you will have a visual record of the insect and of plants they like, whether they are beneficial insects or harmful ones. This photo shows a ladybug on a cowpea plant. I’ve found other beneficials attracted to the cowpeas. As I write this, we are in the grip of weather colder than normal, even for winter here. Before it hit, someone told me she knew a weather event was coming because she saw bluebirds at her bird feeder. Since bluebirds eat insects, they were usually not visitors to her feeder.

At the very least, even if you never record any of these things, start to notice them. Keep your eyes and ears open and you will become more in tune to where you are and what is going on around you. There is a whole other world available to you, right in your garden. All you have to do is take the time to noticeHomeplace Earth

Read Full Post »