Feeds:
Posts
Comments

Posts Tagged ‘cowpeas’

Ladybug eating an aphid.

Ladybug eating an aphid.

Having a garden where everything is in harmony is what I aspire to and what I would hope my readers are looking for, also. Can you imagine having beneficial insects just show up on their own and take out the annoying insects without you having to even think about it? That’s what happens in my garden. In the photo you can see a ladybug eating an aphid. I happened to be in the garden with the camera at the right time to catch that. I found that action on a cowpea plant. I have also found ladybugs on my rye plants when they were flowering. You can tell they are in flower by the pollen bits that are hanging off the potential seed head.

I plant those crops both as food for our table and as cover crops for food for the soil. The most basic thing to remember about having a healthy garden is to Feed the Soil and Build the Ecosystem. When you do that, all sorts of wonderful happens in your garden. Make sure you don’t use any chemicals, even a little bit. That would set your efforts back tremendously. Be alert to the fact that even chemicals that may be allowed under organic certification under certain circumstances could be harmful to the beneficials you hope to attract. Feeding the soil to produce healthy plants is your first protection against insect and disease damage. Healthy plants are less attractive to the harmful insects.

Assassin Bug nymphs.

Assassin Bug nymphs.

Cowpeas must be good for attracting the right kind of insects because I’ve also seen Assassin Bugs, also known as Wheel Bugs, on my cowpea plants. Here is a photo of the Assassin bug nymphs that I found in my garden on a cowpea plant. There was an adult with them, which was a help with the identification. To identify insects I usually turn to Insects, Disease, and Weed I.D. Guide, edited by Jill Jesiolowski Cebenko and Deborah L. Martin for Rodale Press. According to that book “adults and nymphs are voracious predators that feed on both larvae and adult insects, including aphids, beetles, caterpillars, flies, and leafhoppers.” When you find an unfamiliar insect in your garden, identify it before you decide to harm it.

If you are looking for a perennial to plant to attract beneficials without having to replant each year, put in tansy. Tansy is in the aster family, which is known for attracting good insects. Other Aster family members are cosmos, sunflowers, zinnias, and chamomile. In her book Great Garden Companions, Sally Jean Cunningham refers to tansy as “probably the single best attractor for beneficial insects.” When I took a two week permaculture design course in 2006 at Three Sisters Farm in Pennsylvania, Darrell Frye was proud of his Tansy Tangle, as he called it. Once it flowers, tansy can look quite wild when it leans over from the weight of the flowers. Darrell had corralled it with a few fence posts and string to hold it up. At home we have tansy growing across the back of the porch. I have a tendency to let things be more on the wild side than my husband, who has the urge to get the clippers when things look too messy. My remedy to that is to cut some early at the base and it will grow back and bloom again as shorter plants. By the time it is growing back, the rest needs a good trimming, but that’s okay, because I have that early cutting growing back. What I don’t like is if it is cut all at one time. That leaves nothing for the insects. Plants in the carrot family, such as dill, angelica, caraway, lovage, fennel, and coriander, and in the mint family (spearmint, bee balm, and catnip) all contribute to attracting insects beneficial to your garden. You need to let them flower in order to attract those beneficials. Attracting beneficial insects can be as easy as letting some of your basil flower.

Honeybees at the birdbath.

Honeybees at the birdbath.

Pollinators are good to attract to your garden. Although honeybees get most of the attention, there are many other insects that act as pollinators. I was surprised by the amount of water honeybees need in the summer. When I saw my honeybees at my neighbor’s garden fountain I realized I should give them some water closer to home, so I put up a birdbath. Sometimes in June I find it necessary to fill it three times a day! You can see in the photo that my birdbath has a shallow bowl where the bees can wade in on the edge. If they tried to get water from a deep dish, they would drown.

I bought the birdbath with the bees in mind and put it in a flower bed. Of course, it also attracts birds and they are a joy to watch. Birds can be beneficial helpers in your garden by eating pest insects and slugs. Posts or other objects in your garden will give them a place to land and watch for their prey. Have a sit spot for yourself so you can watch them in action. Trellises you may have for your vegetables can serve as resting spots for the birds. Birdhouses on the perimeter add interest to your garden and a place for permanent or seasonal residence for your feathered friends.

Insects need more than plants to keep them around. They need places to live. You can provide habitat for them by providing cover in your paths. Planting white clover there or having mulch, such as leaves, will do for that. If you till your garden all at once, it is like cutting all the tansy at once—there is no place for the insects to go. Having permanent beds and permanent paths contributes to building your ecosystem. Having shady places among your plants and spots left wild, such as weedy fencerows sometimes are, also help the ecosystem. You can attract toads this way. Water spots close to ground level will please them.

There is so much more to learn about attracting beneficials to your garden and you will find some great ideas by searching for information on companion planting. Keep in mind that if you relax, plant a variety of plants, and provide the right habitat, Mother Nature will step in to help you out.Homeplace Earth

Read Full Post »

4.1 How Much To Grow - BLOGHow Much to Grow is the title of Chapter 4 in Grow a Sustainable Diet. If your garden is small and whatever you get from it is a welcome addition to your table, you might not be concerned with exactly how many pounds are produced of anything. You are just happy to have homegrown food in your meals. If you want to be able to predict how much your harvest will be so you can plan to have a certain amount for your family to eat, you can put pencil to paper now and do some calculating.

butternut squash

butternut squash

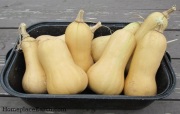
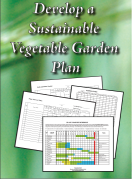
Chapter 4 contains a worksheet (you see part of it here) to help with those calculations. (There is a link in the book that will take you to PDFs of all the worksheets so you can print them out.) Whether you are trying to decide how much to grow for your family or for your CSA, the process is the same. Decide how much you want for each week and how many weeks you will be eating it, or in the case of a CSA, how many weeks you need to put it in the CSA boxes. If you have no idea how many pounds of something you need, go to the grocery store and pick out a reasonable quantity for a meal in the produce department. Weigh it on the scale that is right there. Multiply that weight by how many meals per week that item will supply and you have the pounds needed per week. The number of weeks you want to eat something could be only the weeks it is fresh from the garden, or every week of the year if you are preserving for eating out of season. Rather than the weight, you may need to know the count; how many of something you will have, such as butternut squash. Sometimes you can find that information in the seed catalogs, and sometimes not. From my experience, I know that I can expect about 4 squash per plant. If the catalog doesn’t have that information for the variety you choose, read the description of all the varieties, as well as the specifics for each crop to get an estimate.

Finding out how much is needed is the easy part. You need to know how much you can grow in your area and pounds/100 ft² is a good universal measure to use. How to Grow More Vegetables by John Jeavons has Master Charts that can help you with that. The Master Charts have columns for Biointensive yields and for the US Average for each crop. Use those figures as guidelines. Your yield will depend on many factors, including your soil, climate, and management style. You might already know how much you can harvest in the area planted. If not, this exercise should encourage you to record your harvests this year, at least for the crops you are most interested in.

Mississippi Silver cowpeas

Mississippi Silver cowpeas

Remember the charts are only guidelines. For the Biointensive yield, the Master Charts give three numbers; the beginning yield that you could expect getting at some time, the intermediate yield that could be reached after good soil building, and a high yield that few might reach. The Biointensive yield of winter squash is shown as 50/100/350. There is no US Average shown in the Master Charts, but my research determines that number to be 49.5 pounds/100 ft². The target yield I use for butternut squash is 150 pounds/100 ft². I have reached that yield and sometimes higher in my garden. For cowpeas, the Biointensive yield is 2.4/4/5.9. The US Yield of cowpeas isn’t shown, but through my research I’ve determined it to be 2.6 pounds. I live in a great climate for cowpeas and have found I can use 5 pounds/100 ft² as my target yield. On the other hand, I would love to plan on getting 100 pounds/100 ft² regularly with my potatoes, but the voles keep the yield below that. The Biointensive yield for potatoes is 100/200/780 and the US Average is 84.2. Depending on the variety, I don’t always reach the low Biointensive yield of 100 pounds for tomatoes. The US Average for tomatoes is 67 pounds for fresh and 153.4 pounds for processing tomatoes per 100 ft².

From your garden map you will know how much space you have available. My post Making a Garden Map can help you with that. It becomes a balancing act, deciding how much space to allot for each crop. Having a target yield makes planning easier. Your target yield may need to be adjusted from year to year, but at least you have someplace to start from. Between cover crops and food crops, plan to have your beds full all year. Immediately after your early spring crops are harvested, plant the next crop. Leaving the beds empty is an invitation for Mother Nature to plant her favorites, which we tend to think of as weeds.

The rest of the page of the How Much to Grow worksheet that you don’t see is a space for comments and three columns for the amount of calories, protein, and calcium per pound of food. It is always good to leave space for comments—something about that crop you want to remember. Since I keep records for my certification as a GROW BIOINTENSIVE Sustainable Minifarming teacher, I am interested in the amount of calories, protein, and calcium in each crop. There might be other things that you want to record in those additional columns.

Use this information to enhance what you are doing, but don’t let it overwhelm you. Keep track of what you can. As you find you have more questions, add the appropriate recordkeeping to your system. Most importantly—have fun in your garden this year!Homeplace Earth

Read Full Post »

  • sweet potatoes with peanuts, cowpeas, and collards

    sweet potatoes with peanuts, cowpeas, and collards

This is the fourth year, of the past five, that I’ve eaten only what I’ve grown on the Fridays in Lent. I call these days Homegrown Fridays. I find that it deepens my understanding of what it takes to feed ourselves when I limit myself to only what I’ve grown. By this time of year stored food supplies are diminished and the garden is not quite awake. Our garden and food preservation program has evolved to depend on staple crops that can be stored, rather than canned or frozen. Although I did do a little canning this year, most of the things that couldn’t be stored properly to keep were dried in our solar food dryers.

In the photo you will see one of our Homegrown Friday dinners. It consisted of cowpeas, sweet potatoes, peanuts, and collards fresh from the garden. I often try new things on these days and that day I boiled peanuts. We (my husband and I) decided that eating them raw or roasted was our preference. I depended a lot on peanuts at lunchtime this year. Maybe it was because I seemed to be extra busy on these days. I’d grab some peanuts while sweet potatoes were cooking for lunch. My peanut harvest had picked up in 2012 when I planted some after Austrian winter peas in the rotation. The previous year I had peanuts in a bed following onions and garlic. At harvest time there was a definite difference in the yield in the onion half of the bed compared to the garlic half. Winter peas were the winter cover crop preceding the onion sets that had been planted in the spring. I was pretty sure that the increased peanut yield was due to the winter pea cover crop and not the onions. In 2012 I planted one bed of peanuts after winter peas and one in a bed that had had garlic, onions, and kale. The onions were multipliers and had been there with the garlic and kale since the previous fall. The yield following the Austrian winter peas was three times the one following the alliums and kale.

roasted carrots and beets with black walnut oil

roasted carrots and beets with black walnut oil

I had a great carrot harvest this winter. You can read about it in my post on Winter Carrots. I also had beets in the garden through the winter. The black walnuts yielded in 2012 so I shelled some and made some oil to put on the carrots and beets when I roasted them. Shelling the walnuts and pressing oil took a long time. I wouldn’t want to depend on that for my cooking oil. Frying locally grown bacon and saving the fat for cooking is a lot easier, but that wasn’t an option for these Fridays, since I hadn’t raised the pig. The roasted carrots and beets were delicious.

Soup made from dried ingredients is always on the menu during this time. One soup I made had no dried ingredients. It was made from carrots, butternut squash, and garlic. I cut them up and roasted them—no oil that day. Then I added water and simmered the cut up, roasted vegetables for about 20 minutes. It all went in the blender and resulted in what you see in this third picture. It was good, but a little bit of dairy added—sour cream, yogurt, or milk—would have been nice. Onions would have been a good addition, but I was down to my dried onions and they were in short supply.

butternut squash, carrot, and garlic soup

butternut squash, carrot, and garlic soup

Dried onions went into bean burgers using the same recipe as I did in 2012. Our staples for these meals from stored crops were sweet potatoes, peanuts, cowpeas, garlic, sorghum (for flour) and corn (for cornmeal). Fresh from the garden came collards, kale, carrots, and beets. I ground Bloody Butcher corn to make cornmeal mush for breakfast. We have chickens, so we have eggs. I use an egg or two occasionally on Homegrown Fridays, but not much because I don’t grow all the feed for the chickens. Since some of their nutrition comes from our property, an occasional egg is included. Dried tomatoes were important for sauce and other dried vegetables and herbs provided variety in our meals. I’ve already written about our new tea ingredient—Red Thai Roselle Hibiscus. With such a great honey harvest last year we could sweeten our cornmeal mush. Unfortunately, our two beehives didn’t make it through the winter, so I’ll be looking for new bees this year. We had mead made from our honey and grapes, and popcorn cooked without oil.

Observing Homegrown Fridays at this time of year makes me more determined to work out my vole problem with the potatoes to make sure I have enough to last through the winter. I’m also acutely aware that I need to up my wheat harvest. I had an interesting conversation with Eli Rogosa of the Heritage Wheat Conservancy in January while I was preparing an article for Mother Earth News that will appear in the June/July 2013 issue. Eli filled me in on heritage wheat and how to grow it. A chart with her recommended varieties for each region of the U.S. will appear in the article. A chart with crops I’ve mentioned here and varieties recommended for each region will also be included in the article. You will be interested in that article if you want to grow staple crops for your meals.

If you have done any of this, even in a small way, I welcome your comments. It is in sharing, both information and food, that we will move forward on this journey.  Homeplace Earth

Read Full Post »