My homegrown, handspun, handwoven, naturally-colored, cotton shirt is in the latest issue–April/May 2018–of the Mother Earth News!


You can access the article online here, but it is prettier to read in the print magazine.
Enjoy!
![]()
My homegrown, handspun, handwoven, naturally-colored, cotton shirt is in the latest issue–April/May 2018–of the Mother Earth News!
You can access the article online here, but it is prettier to read in the print magazine.
Enjoy!
![]()
Posted in Cindy Conner, colored cotton, cotton, homegrown cotton, homegrown handspun shirt, homegrown handspun vest, Mother Earth News, seed to garment | Tagged Cindy Conner, colored cotton, grow your own clothes, handspinning, homegrown cotton, Indian book charkha, seed to garment, Seed to Shirt, small table loom, tahkli spindle | 4 Comments »
 Last December I finally got around to making a wallhanging using my old jewelry. It was an idea that had been bouncing around in my head for years, but I never took the time to act on it. If you know me, you know that I wear very little jewelry, but that didn’t prevent it from accumulating over the years. With my mother’s passing in 2014, the calling to do this became louder.
I began to think of what I would leave behind. The jumble in my jewelry box would be just that, a jumble, to whoever got the job to clean it out. That jumble, however, was full of stories. Everything had a story, just like the patches on a quilt. Not that I plan on leaving this earth any time soon, but if I passed on, the stories would go with me if I didn’t do something about it. By putting these items into a wallhanging, they would get out of the box and the stories would be told. You could make any sort of wallhanging to decorate with your jewelry. For me, decorating a Christmas tree made sense, since the family gathers here at Christmas and the stories can be told to all. In fact, our grown children may have their own tales to add.
I had bought a yard of green batik fabric for a project that never happened and one day I saw it with new eyes. It was the exact piece I needed for the Christmas tree on the wallhanging I envisioned, so maybe it was time to get started. In my mind, the background was a blue batik fabric with stars. Sure enough, that is what I found at the fabric store. Batik fabrics are made with a wax-resist dyeing method and come in many interesting designs. If your local fabric store doesn’t carry them, check with a quilt store.

We kept a milk cow for 7 years.
There is a layer of quilt batting between the blue background and a backing fabric and between the green fabric and the blue. I cut the Christmas tree ¼” wider for a seam allowance to turn under. The tree is hand-stitched to the blue background. The pins from the “ornaments” and the thread from items I sewed on quilt the tree, background, and backing fabrics together. The red used on the side borders, also a batik, helps to set off all the colors. The gold cords used to hang it with are what I wore at my high school graduation to designate I was in the National Honor Society. They have been cluttering up my jewelry box since 1969.

Typing 50 words/minute with minimal errors on a manual typewriter earned me the winged 50 pin in high school.
Necklaces are great for garlands. Our class rings are here, as well as the pins I received as recognition for activities over the years. Back in the day, charm bracelets were the thing to give girls so that you could give them charms on gift occasions and you didn’t have to think of anything else. I had two charm bracelets and many more charms that never made it to the bracelets. I never pierced my ears or else there would be earrings on this wallhanging. There are numerous 4-H pins from my days as a 4-Her growing up and later as a 4-H leader.
 This wallhanging tells stories from my life, beginning at birth. There is the small beaded bracelet that was put on me in the hospital when I was born. I was Snyder B and my first born twin sister was Snyder A. Other relatives and friends are recognized in this wallhanging. One summer when we were in high school, my friend Dixie went to France and brought back an Eiffel Tower charm for me. Dixie and I still keep in touch. The pin my husband received for having donated 100 pints of blood over the years is here. What else do you do with something like that? The base is a souvenir given for participation in the Heritage Village at the Virginia State Fair. We were the family that looked like we lived in the log cabin for the first two days of the fair. It is sewn on at the corners with my homegrown handspun brown cotton yarn.
 There are a few pins that belonged to my parents and a large heart-shaped ”D” pin that had belonged to my great grandmother. I never knew her name was Delia until my aunt passed that pin on to me. The angel at the top of the Christmas tree is a pin given to me by the same beloved aunt many years ago. You may not have a collection of old jewelry to do this with, but maybe you have your father’s old fishing lures or a button jar from your grandmother. I’m sure if you start looking around at what odds and ends you have been saving, you will find a use for them in a wallhanging such as this. Before I decided on the size, I laid out what I had on a large piece of paper to see if it would fit, then drew the tree for a pattern.
As you can see, I have had a full life, with more adventures to come. This blog has been quite an adventure, and one that I am happy to have had. In my last post I wrote about balance in your garden. We need to keep balance in our lives, also. Life continues to be busy here and there are other things I want to turn my attention to, so I am going to step back from the blog to keep that balance. Don’t worry, there are no broken bones or other health problems, just lots to do. Everything will still be here for anyone to find. My website at HomeplaceEarth.com will continue to be active with my books and DVDs for sale and the Events page that shows where I will be speaking. I have had a great time sharing what I know with you through this blog. My wish is that you build on what you learn here and make even better adventures yourself. Most importantly—have fun!
![]()
Posted in Uncategorized | Tagged holiday heriloom wallhanging, make a Christmas tree wallhanging, wallhanging from old jewelry, what to do with old jewelry | 6 Comments »
 Over the years, whenever anyone asked me for advice on organic gardening, my response has always been Feed the Soil and Build the Ecosystem. Often they were expecting recommendations on what amendment or pest control product to use. However, you need to look at the whole system, rather than addressing symptoms of imbalance as they pop up. Now that permaculture is becoming more widely publicized, whole system management is more well known
Feed the Soil—Now is a good time to take a soil sample. I send my soil samples to Waypoint Analytical, formerly A & L Eastern Labs. If you are not good at interpreting the results that they send you, you could contact John Beeby at www.growyoursoil.org for organic fertilizer recommendations. Check with his website for which test to request and where to have it done. You will need to sample the soil from many places in your garden, then mix everything together for your sample to send in. The soil you see in the photo looks really good, but remember that I have been working on my soil for many years.
Correcting imbalances in your soil is the first thing to do if you are not receiving the results you want in your garden. Sometimes, well meaning actions can lead to imbalances, including adding a lot of manure to your garden every year without testing first. Sometimes people lime every year because they assume it is a good thing. It is only good if your garden needs more lime. Even if you do not do a soil test each year, you should have one to use as a baseline, then do one a couple years later to see how things are going. Make cover crops a part of your soil building efforts. The organic matter they add with their roots, and with the plant matter you harvest and use as mulch or compost material, is a tremendous benefit.
Build the Ecosystem—Well-nourished soil cannot go it alone in producing good crops. Malnourished plants will attract insects that will take them out, for sure. However, even well- nourished plants need pollinators. Also, if there are any insects munching your plants, you want to have beneficial insects taking up residence in your garden to eat them. In order for the beneficials to stay, there needs to be some other insects around as food. Buying insects to add to your garden is not as effective as attracting and naturally growing your own,
Chemicals, even those approved for organic production, can harm beneficial insects, as well as the not-so-desired ones. Furthermore, you have to acquire and apply the chemicals. If you include plants that attract the good insects into your crop mix, all you have to do is to stand back and watch the show. That’s what happened when I planted mountain mint, as well as other plants in the margins of my garden. I had visitors to my garden this summer who stopped in their tracks and asked the name of the plant when they saw all the buzzing around the mountain mint. It was an insect frenzy! Tansy is also well-documented as attracting beneficial insects.

Goldenrod with honeybees and butterflies.
The best time to witness beneficial insects on your plants is between 10am and 2pm in your garden. Goldenrod grows up in the wild areas of my garden if I don’t cut it down through the season. Since I am getting interested in natural dyes, I cut some for a dyepot recently. When I went out with my clippers, there were so many insects buzzing around it that I backed off. I did take some where there was little action going on, but left the rest to the beneficials.

Leatherwing on spearmint.
You can also experience all this by letting some of your regular garden plants, such as basil, flower and go to seed. Spearmint, which can take over if you are not careful, attracts many beneficials if you let it flower. I like to have celery come back each year and go to seed. On the way to making seed that I save for culinary use and replanting, the flowers attract an array of good bugs–and all I have to do is watch it happen. Besides the insects you see in these photos, you will see bumblebees, wasps, beetles, spiders, and more in your garden if you allow it to happen.

Assassin bug babies.
Learn to identify insects you find in your garden so you don’t freak out and destroy the good ones you see that might surprise you, such as the assassin bugs in this photo. I found this young family on my cowpea plants. Although I’ve found ladybugs on other plants, my favorite ladybug photo is one I took on a cowpea plant of a ladybug eating an aphid.

Ladybug eating an aphid.
To attract many of these good insects, you need to have permanent plantings. Weedy fencerows can provide habitat. Not tilling all your garden at once will help, as well as having permanent paths. A border with permanent plantings will provide overwintering habitat. These things will enhance the year-round beauty of your garden and will be less work for you in the long run. The book Great Garden Companions by Sally Jean Cunningham is a good reference to consult if you want help deciding what to plant to attract specific insects to help with certain pests.
Now is a great time to make your 2018 garden plan to ensure that you plant the desired cover crop, considering what your following crop will be, in each bed for next year. I locate my compost piles on my garden beds and rotate them, along with my other crops to contribute to soil fertility. The advantage of that is evident in the crops that follow. Managing your plantings to attract and maintain beneficial insects in your ecosystem will create a garden that is a joy to be in.![]()
Posted in beneficial insects, companion planting, compost, cover crops, cowpeas, garden paths, garden pests, garden planning | Tagged aphid and ladybug, assassin bugs, attracting beneficial insects, balance the ecosystem, beneficial insects, cover crops, feed the soil, goldenrod with honeybees and butterflies, Grow Your Soil, leatherwing on spearmint, soil fertility, soil test | Leave a Comment »
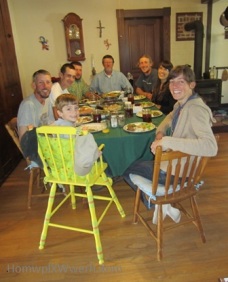 Come to the Newfound Gathering Place and Eatery in Ashland, VA on Wednesday, September 27 for a Farm-to-Table dinner and a talk on eating from your garden through the winter–all for $15!
The evening begins at 6 pm with dinner sourced from local farmers. The menu is:
Butternut Squash and Pine Nut Soup–Ashland Farmers Market
Microgreen Salad–Carrot Top Farm
Meatloaf (vegan and gluten-free option available)–Dragonfly Farms
Garlic Fingerling Potato Roast (vegan)–Delli Carpini Farm
Additional Vegetable–to be determined
Lemon Pound Cake with Raspberries (gluten-free)–Agriberry
Iced Tea or Fresh Citrus-Aide
 At 7 pm I, Cindy Conner, will present The Winter Garden: Grow to feed yourself and the soil through the winter. Learn about planting cover crops and garlic this fall and how to make a row cover to protect the greens and roots in your garden for winter harvest.
Okay, so the first photo is obviously not taken at the Newfound Gathering Place and Eatery, but is of my wonderful family having a meal in our home. Come to Newfound (formerly Ashland Coffee and Tea) at 100 N. Railroad Ave, Ashland VA on Wednesday and join other wonderful like-minded people for a great local dinner and learn how to eat from your garden through the winter. Call for reservations at 804-299-3604. Make sure to tell them if you prefer the gluten-free / vegan meatloaf option. I hope to see you there. ![]()
Posted in Uncategorized | Tagged farm-to-table dinner, Newfound Gathering Place and Eatery, row cover to protect winter greens, the winter garden | Leave a Comment »
![]() The Heritage Harvest Festival is coming up September 8 and 9. It is a huge deal held at Monticello, home of Thomas Jefferson, near Charlottesville, VA. This event is sponsored by the Thomas Jefferson Foundation, Southern Exposure Seed Exchange, and Seed Savers Exchange. It celebrates food, sustainable agriculture, and the preservation of heritage plants.
The Heritage Harvest Festival is coming up September 8 and 9. It is a huge deal held at Monticello, home of Thomas Jefferson, near Charlottesville, VA. This event is sponsored by the Thomas Jefferson Foundation, Southern Exposure Seed Exchange, and Seed Savers Exchange. It celebrates food, sustainable agriculture, and the preservation of heritage plants.
Saturday, September 9 is the main event. Up on the mountain there will be booths with vendors, demonstrations on all sorts of stuff, and tents where talks will be held. For one admission price of $28 (children 5-11 $9, under 5 FREE) you have access to all the speakers that day. In years past, some of the talks were premium talks that required signing up ahead and paying a separate fee. Many of the premium talks were held at the visitor center. This year on Saturday there will be no talks at the visitor center.

Homegrown Flax–retted straw, processed fiber, spun flax (now called linen)
There will be premium talks at the visitor center on Friday, September 8 and that is where you will find me. This is the 11th year for the festival and the 10th year that I will be speaking there. The Heritage Harvest Festival celebrates local food and gardening and usually my talks reflect that. I have given talks on cover crops, growing sustainable diets, garden planning, seed libraries, and how to transition from a home gardener to a market gardener. This year my talk is From Seed to Garment: Cotton and Flax/Linen in Your Garden. I am looking forward to sharing my work with fiber. Monticello is working on a textile exhibit that will open in 2018 to showcase the spinning and weaving that was done at the plantation, primarily to clothe the slaves. I am happy to bring a bit of textile production to the place ahead of that.

Homegrown, handspun, naturally colored cotton shirt.
I will still be around on Saturday and you will find me in the Homeplace Earth booth, #RR7 on Retailer Row. If you can’t make it to the talk on Friday and really want to take a closer look at my homegrown clothes, come and find me Saturday. I will have them in the booth, along with my DVDs and books that I have for sale. I won’t be selling any homegrown clothes, though.
This is a unique event. You get to hang around Thomas Jefferson’s backyard and enjoy so many things besides the great view. My friends Kim and Jimbo Cary will be playing music under the trees. They will have some gourds, washboards, and tamborines for you to use if you want to join in. They are great with the kids. When you are not taking in a lecture you can stop by the Seed Tent and do some seed swapping. Southern Exposure Seed Exchange will have their tomato tasting, as always. You can wander through their tent and try varieties of tomatoes that you probably never knew existed. I’m sure Thomas Jefferson is in his glory, having all of this at his home. He so much enjoyed experimenting with new crops at Monticello. When I am there I take the time to stop, look around, and marvel at what is going on. All of this celebration of agriculture and food in this particular place! Fantastic!
The Heritage Harvest Festival will expose you to many new and not-so-new projects around the region that promote sustainable agriculture. A word of warning to those like me who carry a pocket knife–this year they will be screening for things like that, so leave your knife in the car. Come for a day on the mountain, make new friends, and be sure to come by and see me!![]()
Posted in colored cotton, flax, Heritage Harvest Festival, seed to garment | Tagged colored cotton, cotton and flax/linen in your garden, flax to linen, Heritage Harvest Festival 2017, homegrown handspun colored shirt, Monticello, seed to garment | Leave a Comment »

Onion braids hanging in my shed.
I have been writing quite a bit this year about growing cotton and flax, with the idea of taking the fiber all the way to clothes you can wear. Scroll through my posts and you will have enough information to begin working on growing your own clothes. You will be hearing more about fiber in the future, but now I will turn my attention back to food crops.
Onions are a great crop! Plant them at the right time in the spring, harvest them all at the same time, and, if you have grown enough and stored them carefully, you can be eating your homegrown onions all year. Onions grown for storage can become a staple crop for your homegrown diet. Open-pollinated onion varieties good for storage include New York Early and Red Wethersfield, but there are others. Sweet onion varieties, however, do not last as long as the varieties grown for storage. The descriptions in seed catalogs should indicate if a variety will store well or not.
If you have had a problem with the onions you buy at the grocery store sprouting in a relatively short time after you brought them home, you are probably wondering how you could ever keep them long term. Well, the ones you grow are much different from the ones you get at the store, primarily because you can manage them from the time they come out of the ground. Most likely, the store-bought onions have already been kept for a long period in cool conditions and, once they are brought out to room temperature, they are ready to sprout.

Onions in fence circle just after harvest.
By this time of the year you have probably already harvested your onions, hopefully before the tops died back. If so, you will have them to braid. Onions need to be cured after harvest under conditions with good air circulation. You could lay them out on a screen or board in the shade or lay them out on your barn floor, which is what I used to do before I began putting them on a circle of fencing. I went to the fence circle once I was growing more than my barn floor could accommodate. For each circle, I use a piece of old welded wire fencing with 2”x4” spacings. It sets on two cement blocks in such a way that allows good air circulation up through the middle. It could also be hung from the rafters, which would get it off the floor and provide even greater air circulation. I put each onion in the middle of the circle and pull the green top through the wire to the outside. Those tops will die back in the next couple weeks. Having them on the outside, allows them to dry quicker than if the onions were on the outside of the circle and the tops were inside.

Onions in the fence circle ready to sort.
Most likely, no matter what you have done with them, you have reached the stage where the onions tops have dried and it has become apparent that not all your onions are going to keep till the spring. It is time to sort through them. Identify the ones to use early and which ones you can keep for later. Hold each onion in your hand and put your thumb over the spot where the top comes out. Press down. If there is much give, put it in the “use now” pile. If it is very hard, set it aside to braid or otherwise store for the long term. If there is just a little give when you press down with your thumb, put it in the “use next” pile, meaning it will be used after the “use now” pile is depleted.

Onions in solar food dryer.
The “use now” onions are what you want to be using as you are canning salsa, spaghetti sauce, or anything else that needs onions this summer. You could also cut them up and put them in a dehydrator. Here is a photo of some onions in my solar dryer. My extra “use now” onions are sitting in a basket on my back porch and that is what I am using for summer cooking. I’ve braided my “use next” onions and labeled the braids so that I will use them before the long term storage braids. For now, all the onion braids are hanging in my garden shed. About mid-October I will transfer them to the crawlspace under our house. I have put nails in the joists just to hang onion and garlic braids through the winter. Even in the coldest times here in central Virginia it never freezes there. You can find details about how to braid onions in my July 28, 2015 post.
There are many ways to manage onions, but this method is what I have found to be most helpful It is a wonderful feeling to reach the point where you are growing most, if not all, of the onions you will need for the year. The important thing is to not crowd them in a warm place. They need to have air circulation. A story for another day is about using onion skins to make a natural dye. As I use the onions, I save their yellow skins in a mesh bag to use in dyeing. There is much fun to be had from what you can grow in your garden!
Onions have many health benefits, which I wrote about on January 24, 2012. Knowing how healthy onions are for you should prompt you to include onions in your diet as often as possible. Learning to store the onions that you have grown for the long term brings you one step closer to being able to put homegrown meals on the table all year long.![]()
Posted in food preservation, food storage, onions | Tagged braiding onions, drying onions, dyeing with onion skins, managing your onion harvest, New York Early Onions, Red Wethersfield Onions, sorting onions, storage onions | 4 Comments »
 Hackling takes freshly broken and scutched flax and turns it into fine fiber ready to spin. You toss the ends of the flax onto the hackle and draw it through. With each new toss, add more length of fiber until you get to the middle. Then turn it around and do the other side, beginning with the tip.
Just like with flax brakes, flax hackles may be hard to find. I found my first one for $60 in an antique mall in Pennsylvania. The spacing of the tines varies and you will find them in fine, medium, and coarse spacing. Lucky for me, the one I found in that antique mall was a medium. The tines are a half inch apart with offset spacing, meaning they are not lined up like the corners of a square. If you have a medium hackle you can do a good job of processing flax into fiber to spin with just one hackle.

line flax, tow, and medium hackle
The first flax I processed here was some I bought unretted from the Landis Valley Farm and Museum. When you hackle flax you will end up with line fiber that will look like a ponytail and you will have a good quantity of tow. Tow is what is pulled out of the ponytail by the hackle and can amount to quite a bit. You can re-hackle the tow and get usable fiber. Tow fibers longer than 6” can go back through the hackle. If the tow is shorter than 6” you will need to card it. Wool cards can be used for tow, but it is best to have a set just for flax. In this photo you can see line flax, tow, and my antique medium hackle.

homemade coarse hackle
The medium hackle worked well, but I wanted to take it further and make a coarse and a fine hackle. For the coarse hackle, I sharpened 28 16D common nails and set them into a piece of walnut 1″ apart on offset spacing. The nails were 3½” long. I chose to use that many because I was keeping to the size footprint of my medium hackle.—about 4”x5”. I used walnut because we had a walnut board. I used a drill press to make the holes in the board using an ¹¹̷₁₆ drill bit. The nails didn’t fit quite as tight as I wanted, so I set them with epoxy. I made the base from pine. Screws are inserted from the bottom of the pine into the bottom of the walnut to hold the two pieces together. I sharpened the nails by putting each one into a drill press and holding a metal file to it until it was shaped as I wanted it.
That worked well for the coarse hackle, but sharpening all those nails was slow work. For the fine hackle I needed 267 16D finish nails, 3½” long. I decided to use the nails as they were, without sharpening. I put them at ¼” spacing and this time I lined them up as on the corners of a square. I used graph paper with ¼” squares and marked where each line intersected, poking a nail through the paper to mark the wood. I used a ⅛” bit in the drill press for this. The nails fit snug enough that there was no need to use epoxy when I set them. Since there were so many nails in this hackle we added a ½” wide aluminum strip around the sides, screwing it on at two places on each side. It may or may not be necessary to keep it from splitting, but it really looks great!

fine hackles–antique and newly homemade
We used the plans from Woolgatherers as a guide to start, with added inspiration from the medium hackle I already had. Flax hackles can be as distinct as the maker. In days gone by, they would have been made on the farm or by a blacksmith. In her book, The Practical Spinner’s Guide to Cotton, Flax, and Hemp, Stephanie Gaustad says that the tines on hackles for flax should be square in cross section, with each side sharpened, rather than round like the nails I used. However, they are round on the antique medium hackle I have. I was able to purchase a fine hackle at the auction at the Maryland Sheep and Wool Festival in May for $40. The cross section of the tines on that hackle is square. The edges may have been sharp at one time, but they aren’t now.
I thought I would eventually get around to sharpening the ends of some nails for a fine hackle to compare to the one with the plain nails, but I haven’t done that yet. Since I acquired the antique hackle, I don’t know if I will bother making another. I thought I might notice a big difference between the two fine hackles, but I have worked with them side-by-side and nothing stands out so far. Future work with the two hackles might reveal a bigger difference. I do like having fine, medium, and coarse hackles.
This is how people processed flax for linen on their farms until commercial fabric was available. Some people are learning this so they can demonstrate it for historical purposes. I think we need to look at it as, not only something done long ago, but as an activity that we can do on our homesteads and actually make clothes and other textiles for ourselves again. We can go from seed to garment, right at home!
There is a Fibershed movement going on that is exploring ways to make local fabric a viable production possibility. For that, you need to go beyond the flax brakes and hackles that I have described to increase production for a community. It just so happens that the Taproot Fibre Lab in Nova Scotia has been working on production scale equipment. Also, the folks at the Chico Flax Project in Northern California have been working on a community Flax to Linen project and there is a Flax to Linen group in Victoria, British Columbia. So, local linen is a possibility for communities in the not so distant future, although it already is a possibility in your backyard.![]()
Posted in Fibershed, flax, handspinning, seed to garment | Tagged antique flax hackle, Fibershed, flax hackle made with nails, flax to linen, flax tow, hackles, hackling flax, homemade flax hackle | 7 Comments »

Flax Brake and Scutching Board
Being able to grow your own flax fiber to spin and weave into linen clothes is a wonderful experience. The growing is the easy part. Once flax straw is retted it can be stored indefinitely until you are ready for the fiber. When that time comes, you need to have some equipment that may not be readily available until you make it yourself. You will need a flax brake and a scutching board.
The fiber you are after is located between the skin and the inner core of the flax stems. A brake is the tool that you will use to break up those outer and inner layers, freeing the flax fiber. I have seen the tool name spelled as both “brake” and “break”. In The Big Book of Flax, Christian and Johannes Zinzendorf mention that the noun and verb are spelled differently for some reason unbeknownst to them. Flax brake is also the term used in Linda Heinrich’s book Linen, so that is the spelling that I will go with.

Flax Brakes
If you just want to see if you can do it, probably any method of pounding the flax will break up those layers and result in releasing the fiber. However, if you are going to produce enough fiber to work with, you will want to be as efficient as possible. When I was learning about flax I was fortunate that my friend Becky loaned me her brake. Now I have my own and you can see them both in this photo. Becky’s is obviously smaller. She has used it in demonstrations with children and says she puts it on bricks to raise it to use herself. You see mine here when it was brand new—before I applied an oil finish. My talented husband made it from plans we purchased from Woolgatherers. Those plans were made from the design of an antique brake. The only change we made was to make ours several inches taller. It is put together with pegs and can come apart into four pieces—the top, two legs, and the bar between them.
My brake is made of oak left from a previous building project. It was rough-cut and my husband used his planer to smooth the pieces. To make the holes precise so the dowels fit well, he used a Forstner bit in his drill press. The wooden knives were formed on the table saw. This brake is a terrific tool to use. Becky’s brake is lighter and easier to tote around in a car when she takes it places for demonstrations. The legs on hers are screwed on and, as far as I know, she doesn’t take them off.

Tabletop Flax Brake
For portability, you can’t beat the brakes we used at the Flax to Linen class with Cassie Dickson at the John C. Campbell Folk School. They are easier to build, lightweight, and take up little space. Cassie brought this tabletop brake to the workshop at my place.

Notice the rounded edges on the bottom of the tabletop brake.
It works well and is great to take for demos, but I would like it to have a way to clamp it to the table for serious work. It is certainly easier to make than the larger ones. In order for it to work, you need to be sure and round the bottom ends on the inside pieces, as you can see in the photo.

Simple Tabletop Brake
Another simple brake that was available at the Folk School class is this one. You could use clamps on the pieces that stick out on the sides. Not all brakes have two wooden knives that go into slots to break the flax.

Antique Flax Brake
Some brakes are singles, like the antique brake in the photo. The wooden knives that come together to do the breaking are beveled on the larger free-standing brakes, but not on the tabletop models. The brake you make will depend on the tools you have available and your expertise in using them. Decide what features you want and go from there.

Scutching Board and Knife
The next step is scutching. The broken inner and outer pieces clinging to your flax fiber after breaking is called boon. The process of separating it from the flax fiber is called scutching. Boon can be whisked away by rubbing it off against a hard surface, often using a scutching board and wooden knife. My scutching board was made from a wide pine board that still had bark on the edges. Our source of such wood is our daughter and son-in-law’s sawmill. The scutching knife was cut from a 2×4. Both pieces were based on plans from Woolgatherers. We changed the top of the scutching board to make it easier to build and I am quite happy with it. I like the fact that my scutching knife can be stored by hanging it from the scutching board.

Tabletop Scutching Boards
At the Folk School we used the tabletop scutching boards that you see here. They are easy to take for demos. You don’t have to go to elaborate means to make a scutching board. When I first processed flax at home I used a scrap piece of plywood for the board and a piece of wood trim for a scutching knife. Actually, you could probably just whack it against a tree to release the boon.
Not all the boon will come off with scutching. Further cleaning will be done with hackles, but that is a story for another day. My next post in two weeks will be about hackles. ![]()
Posted in flax, seed to garment | Tagged flax brake, flax to linen, scutching board, scutching knife | Leave a Comment »

Flax brake in use during workshop.
Last month Clotho’s Handspinners, the handspinning group I am part of, sponsored a Flax to Linen Workshop. My husband, Walt, and I hosted it at our place and it was wonderful! Cassie Dickson, our instructor from North Carolina, has been working with flax for many years and teaches the Flax to Linen class at the John C. Campbell Folk School each year. I met her when I took that class in 2015. Although the pictures you usually see in this blog are ones that I took, thank Stephanie Conner, our daughter-in-law, for these wonderful photos. She volunteered to be our photographer for the workshop.

Show and Tell evening program.
Cassie and her husband Charlie arrived on June 9 and that evening everyone came for a 2 hour orientation and show-and-tell. Cassie gave a Powerpoint presentation and explained the many things she had brought for us to see. She had so much good information to share. The next day everyone would learn the mechanics of turning flax into linen, but this was different.

Flax to Linen instructor Cassie Dickson.
The weather was beautiful on Saturday, June 10, for the workshop. Understandably, this part took place outside. Trees provided shade, as did our house, and we put up a canopy for more. The hours for the workshop were 9am to 4pm. Everyone showed up with their spinning wheels, ready to learn. Cassie explained each step of the process of turning flax into linen. Then everyone was free to use the equipment we had set up and have at it for themselves, with help from Cassie, of course. (Once you separate the fiber from the flax straw it is still called flax until it is spun, then it is linen.)

Flax samples grown and retted by Cassie.
Cassie had samples for everyone of flax that she had grown herself and retted differently. This way the participants could have experience working with flax that was over retted, under retted, and retted just right. She also had some line flax that had been purchased for everyone to spin. Line flax is what you would end up with after processing. She showed how to prepare a distaff with line flax and had even brought distaffs for each person to use. They were self-supporting posts with tissue paper wrapped around the top. The flax was tied over the paper and you pulled it from there.

Hackles of various sizes were available to use.

Breaking and scutching with tabletop tools
Cassie brought some equipment with her and we added to it. Besides the distaffs, she had a set of hackles, two tabletop flax brakes, and a tabletop scutching board. I provided my brake (top photo), scutching board, and hackles. We also had the use of two more flax brakes provided by Clothos members Jan and Becky, who are already knowledgeable about flax and wanted to support the workshop. In addition, Jan loaned her hackles. We had plenty of equipment to keep the group busy.

After processing their flax, spinners found shady places to use their wheels.
When they weren’t breaking, scutching, and hackling, the participants were spinning using their own spinning wheels. When I took the class at the Folk School, although already knowing how to use a spinning wheel was recommended, not everyone did. Since this was a group of spinners, that was not a problem here. There are some differences spinning flax over other fibers and that is what they were learning. One of the differences was that it is best to use water when spinning flax, so everyone had a small bowl of water nearby to dip their fingers into.

Flax growing in the foreground in the garden.
Everyone brought their own lunch and I provided water and iced tea. After lunch, before we started back to work, I led a tour of my garden. I had flax growing that was one week away from harvest. There was also cotton to see, plus my food crops, cover crops, and compost piles. When we first started to plan this workshop last winter I knew that my place would be the best location to have it. We could fit everyone in our house and backyard and there would be flax growing in the garden.

Instructor Cassie Dickson (right) offering spinning tips to Susan Palmer.
If you are thinking of bringing an instructor in from afar for a workshop of any kind, you need to plan carefully. We needed to cover Cassie’s travel, food, lodging, and her workshop fee. Also, there was a $45 materials fee for each participant. If travel is by car, reimbursement usually corresponds to the standard IRS mileage deduction for business, which is 53.5 cents per mile for 2017—make sure to count roundtrip miles. So, the further away your instructor is, the more the workshop will cost. If we would have needed to rent a space for the workshop or provide hotel accommodations, that would have increased the cost. Wherever you have it, you need to supply a large enough space, parking, clean bathrooms, etc. Instead, I hosted Cassie and her husband at my home as friends and loved having everyone here for the workshop. Our barnyard provided parking space. The twelve people who signed on for the workshop each paid $140.

Clotho’s Handspinners’ Flax to Linen Workshop, June 2017
It was a great time! Yes, it was a lot of work getting ready to have the workshop here, but that meant projects around the house that we had been putting off got done. The only time the four of us (Cassie, Charlie, Walt, and I) had to sit and enjoy talking together was during dinner before the evening program and breakfast the next morning. It was a busy time, but now more Clothos members know the ins and outs of working with flax, so I have more people to play with. It was a great way to start the summer!![]()
Posted in education, flax, seed to garment | Tagged Cassie Dickson, flax brake, Flax to Linen workshop, flax tools, learning to process flax for linen, planning a workshop, tabletop flax brake and scutching board | 1 Comment »

Flax bundles ready for retting.
It is time to harvest the flax that I planted for fiber in early March. I wrote about harvesting (pulling the stalks) and taking the seeds out (rippling) on May 23. The nice thing about flax is that, once the flax is pulled and dried and the seeds removed, there is no rush to process it further. It can be stored in your barn or shed until your time opens up to work with it. After I pull it to harvest I put it somewhere to dry, which can be outside or inside, depending on the weather. I usually gather it up in bundles with baling twine around each to hold it together; but when I want to dry it, I’ll loosen the twine, or take it off, and leave the flax spread out and leaning against the shed, fence, or the picnic table. I can take the seeds out once it is dry, or do the rippling just before retting, if I am going to be retting soon. I store the flax bundles in my garden shed.

Dew retting fiber flax.
Retting is the process of freeing the flax fibers from the inner core and the outer epidermis of the flax stalks. This is done by dissolving the pectins that hold everything together. I prefer to ret my flax in the summer so that it will be ready for processing further whenever I get to it. Before I studied flax-to-linen I thought that retting involved pools of water or a stream and was happy to find out about dew retting. All I have to do is to lay the flax straw out in the grass! It needs to be spread thin. Of course, here in humid Virginia the grass is heavy with dew each night. If you live in a very dry climate this method may not work as well for you. If the weather is too dry it will be necessary to water the flax every few days. I do that here if it doesn’t rain. It will need to be turned occasionally to keep the moisture level even throughout.

Fully retted flax.
Retting is complete when you can break the stalks and see the flax fibers inside. Under retted flax can be retted again—even at a much later date. Over retted flax is ruinous to your crop, since the flax fibers themselves will have broken down. Watch carefully! Last year, the first year I grew flax here, retting was complete in 17 days in July. During that time, July 9-26, the nighttime temperatures ranged from 67-79° F. (16-26° C.) and the daytime temperatures were 87-93° F. (31-34° C.), so it was quite warm. If the weather was cooler, it would have taken longer. Warm temperatures speed it up and cold temperatures slow it down. The previous fall I retted some flax I bought from the Landis Valley Farm and Museum Heirloom Seed Project. I remember that it took at least three full weeks then.

Water retting flax.
If you are in a hurry, or don’t have a suitable place to leave your flax lying around for several weeks, you could water ret it. Just about anything that can hold water and allow your flax straw to stretch out is suitable to use as a container for retting. When I took the Flax to Linen class at the John C. Campbell Folk School, flax was retted in a plastic box. I have heard of using a child’s rigid plastic swimming pool and even a plastic toboggan sled for the project. I saw the sled idea submitted to the Flax to Linen Facebook page by Corrie Bergeron.
From what I have read, I have come to understand that if flax is left in stagnant water it will produce a smell. To avoid that, you could add fresh water to the container or keep your flax submerged in a flowing stream. Flax has a tendency to float, so it is necessary to put something on top to keep it under water. Boards and/or rocks may be used or anything else you have to keep it down. Water retting is usually faster than dew retting, depending on the temperature of the water.
Once the retting is done, the flax needs to be dried before storing. Just like drying it after harvest, lean the loose bundles against something so that air can pass around them. When dry, the flax bundles can be stored indefinitely until you are ready to process them for the fiber. Processing for fiber—now that is where it gets exciting!
Clotho’s Handspinners held a Flax to Linen workshop at my place on June 10 and the participants processed retted flax into linen to spin. They brought their own spinning wheels and the equipment for processing the flax was here for them to use. I will tell you about that workshop in my next post (July 11). The post after that will have specifics about the equipment you need, such as a flax brake, scutching board, and hackles. This is going to be fun!![]()
Posted in flax, seed to garment | Tagged Cindy Conner, fiber flax, flax to linen, John C. Campbell Folk School, Landis Valley Farm and Museum, retting flax | 3 Comments »


